Follow this quick guide to know how to set up a powerful SLI system!
Step 1 - What You Need
- An NVIDIA SLI-Ready nForce motherboard or an Intel X58 Chipset motherboard
- Two (2) compatible NVIDIA SLI-Ready graphics cards
- An SLI-Ready Power Supply
- Windows XP, Windows Vista, Windows 7 operating system
Step 2 - Check Your Power Supply
- Make sure your power supply is SLI-Ready
- Make sure it has enough PCI Express 6-pin or 8pin power connectors for your cards.
Step 3 - Begin Building!
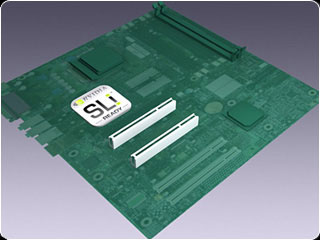
- Install your EVGA SLI motherboard.
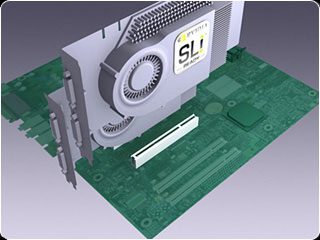
2. Install your primary graphics card into the primary PCI Express slot of your EVGA motherboard (Slot 1).
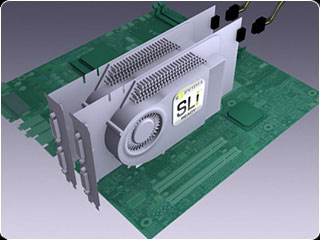
3. Install your additional graphics cards into the next PCI Express slots (refer to motherboard documentation about the correct slots).
4. Connect the required PCI Express 6-pin or 8-pin power connections from the power supply to your graphics cards.
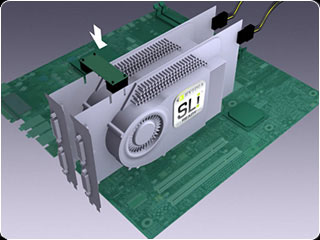
5. Connect the NVIDIA SLI bridge provided with your EVGA motherboard on the SLI slots of your graphics card.
Step 4 - Install and Update
- Install Windows, and update to the latest Service Pack
- Install the latest nForce drivers for your EVGA SLI motherboard first.
- Find the latest drivers here.
- Install the latest GeForce drivers for your EVGA graphics card(s)
- Find the latest drivers here.
Step 5 - Enable SLI
- Go to the Nvidia Control Panel
- Under the 3D Settings Tab, look for "Set SLI and PhysX Configuration"
- Enable SLI, click "Apply"
.jpg)