P67 RAID Build and Rebuild.
Building the array
1. First, plug in the drives you wish to use for your raid array. Power on the PC, at the initial POST screen press delete to get into BIOS.
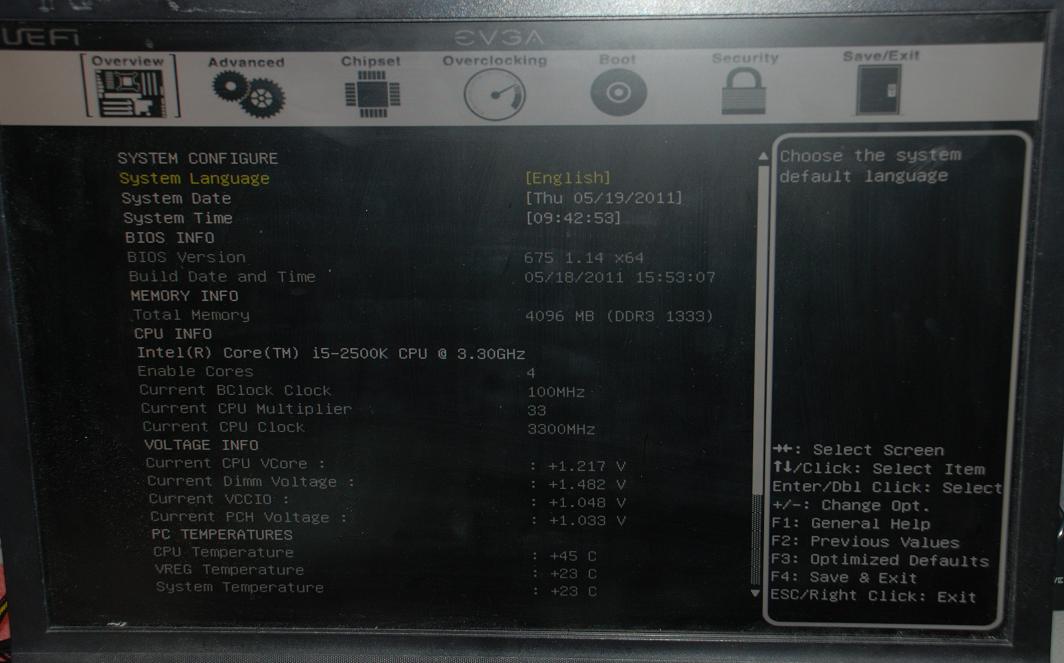
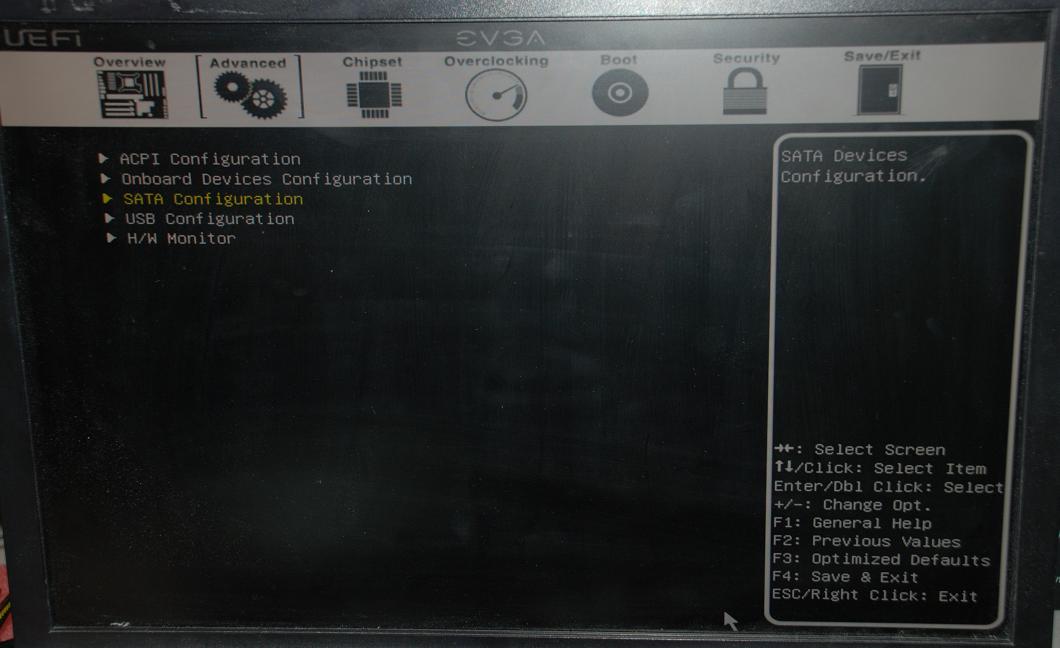
2. Upon entering BIOS, you will start in Overview, goto Advanced – SATA Configuration
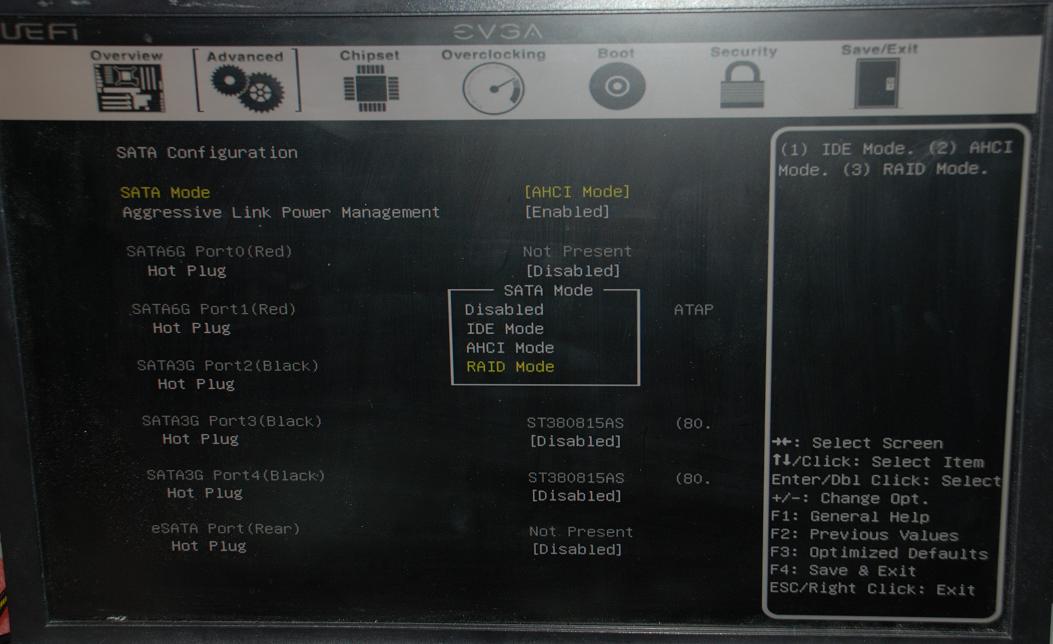
3. Select SATA Mode and select RAID mode from the options. Once it shows SATA Mode [RAID Mode].

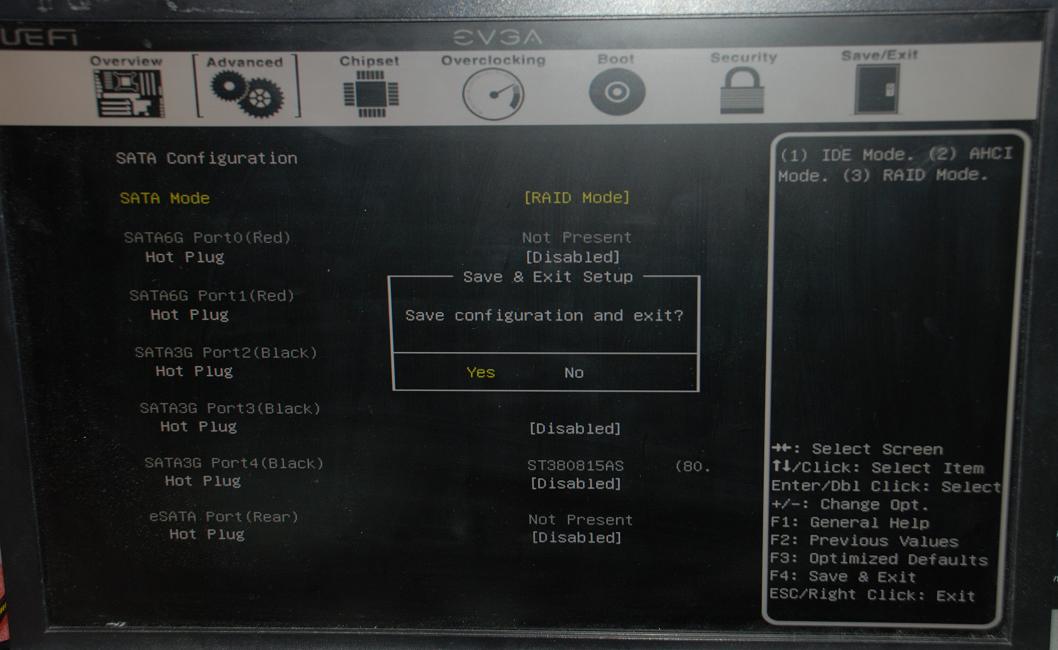
4. Press F4 to save and exit (not F10 like older generation motherboards). Select “Yes”
5. System will reboot, after you exit the BIOS, after the first BIOS screen, you will see the RAID BIOS screen, Press CTRL-I to enter RAID BIOS (as stated on screen).
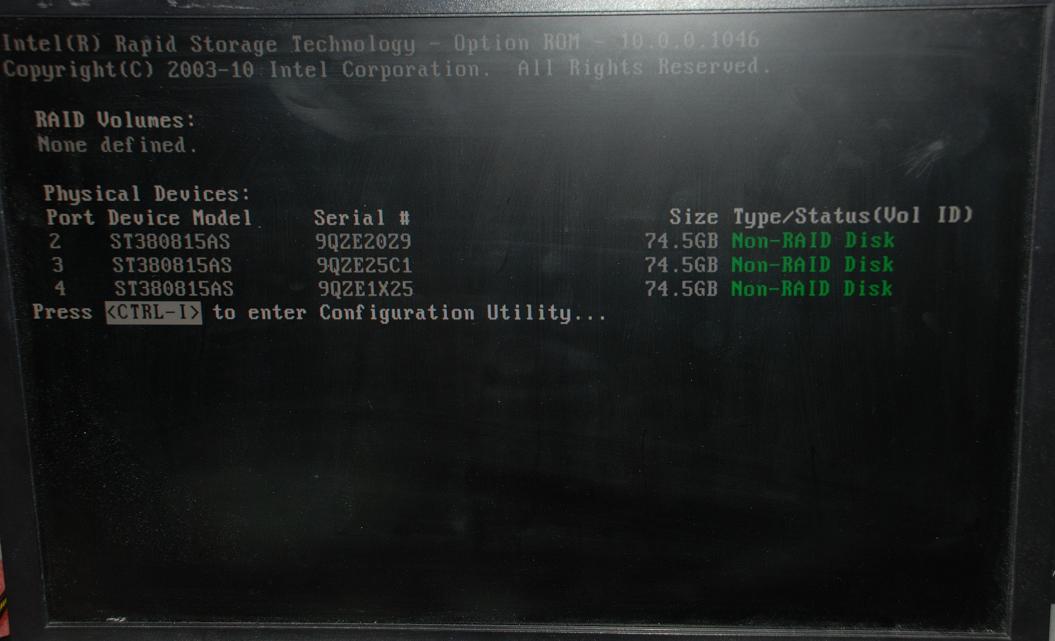
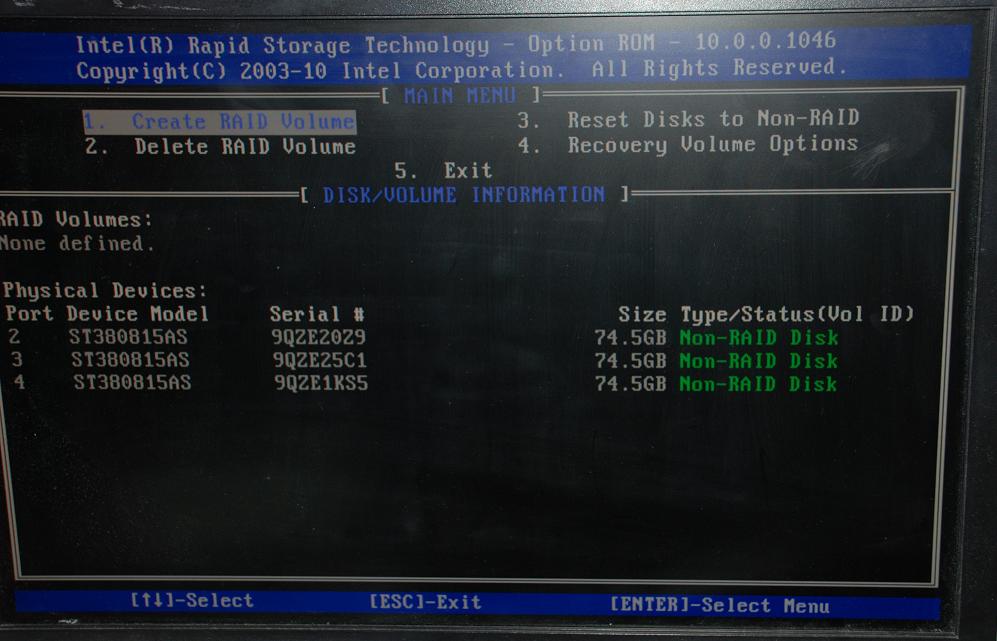
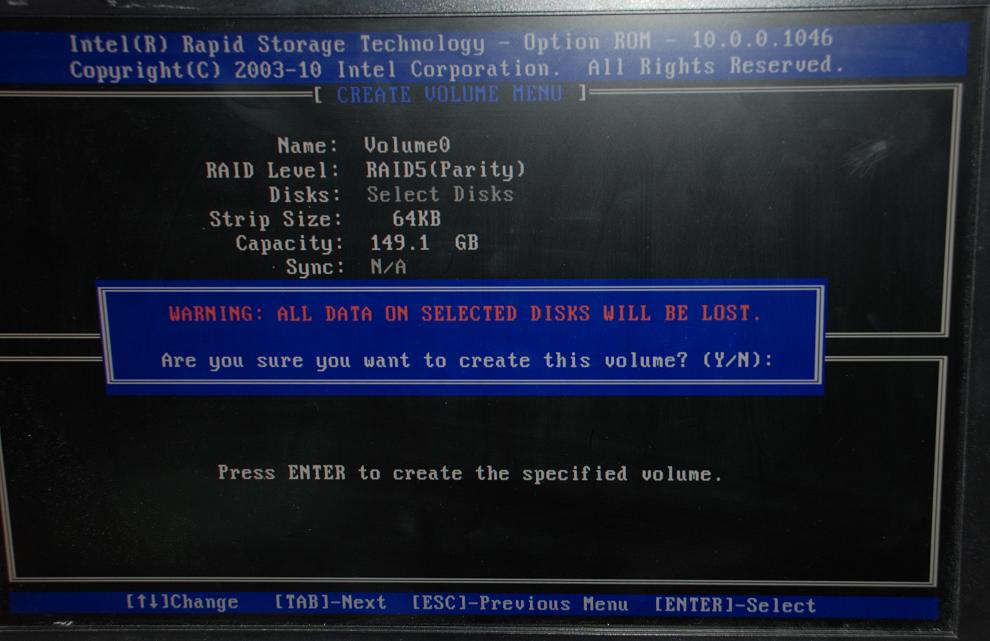
6. The menu will default to “1. Create RAID Volume” press enter on that option.
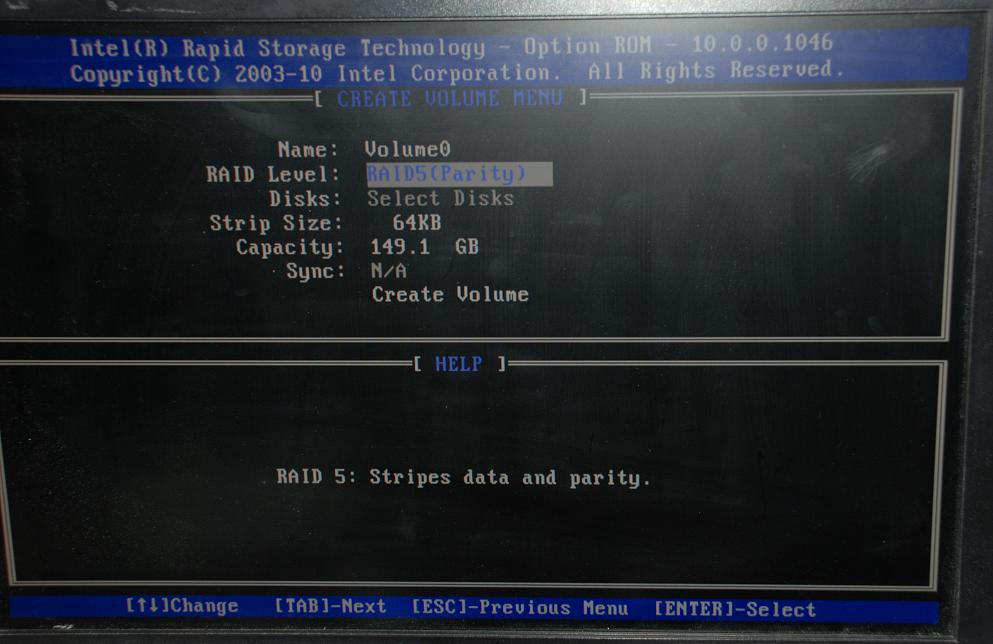
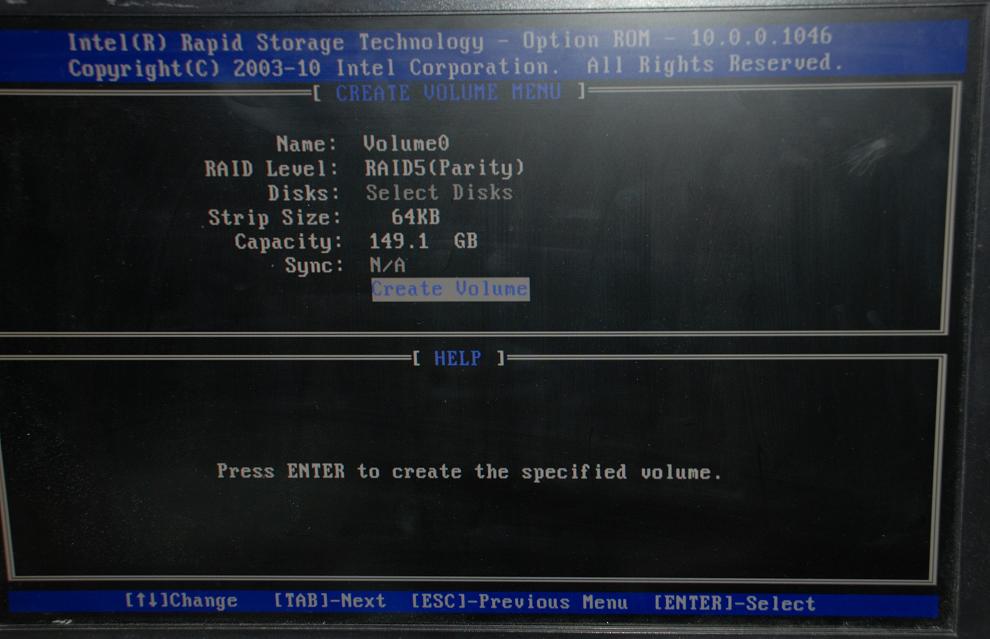
7. Volume name can be left blank, if you wish to name it, please do so, then press enter. You will have the option to select RAID type, select the RAID types with the arrow keys, press enter to select the desired array. Select your disks per the instructions onscreen, leave the Strip Size as default, lastly, hti enter on “Create Volume”, select “Y” for all data will be lost.
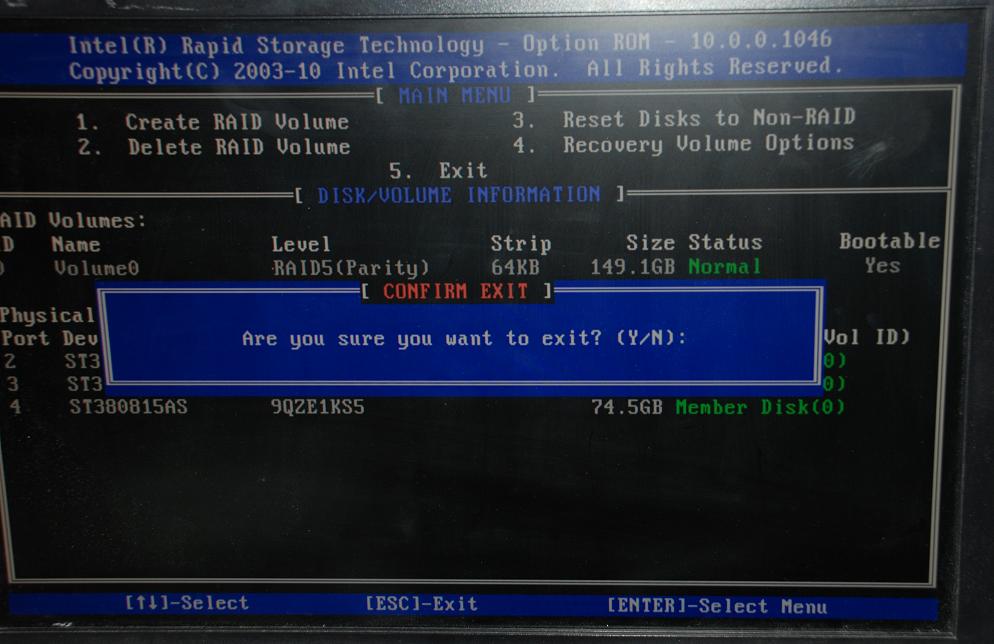
8. Select option 5 with the arrow keys, confirm “Y” to save and exit. System will reboot from POST.
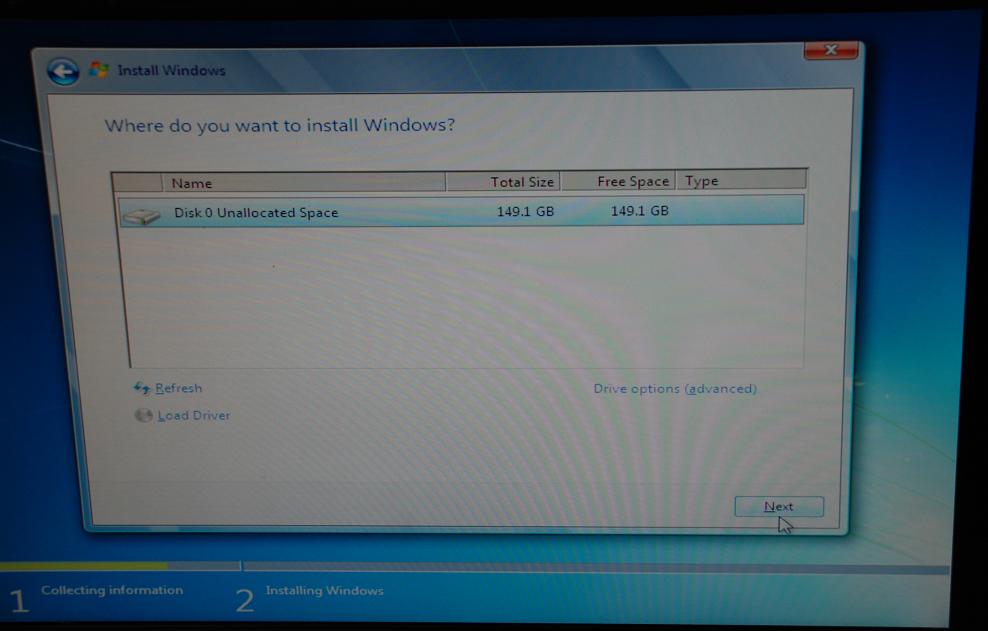
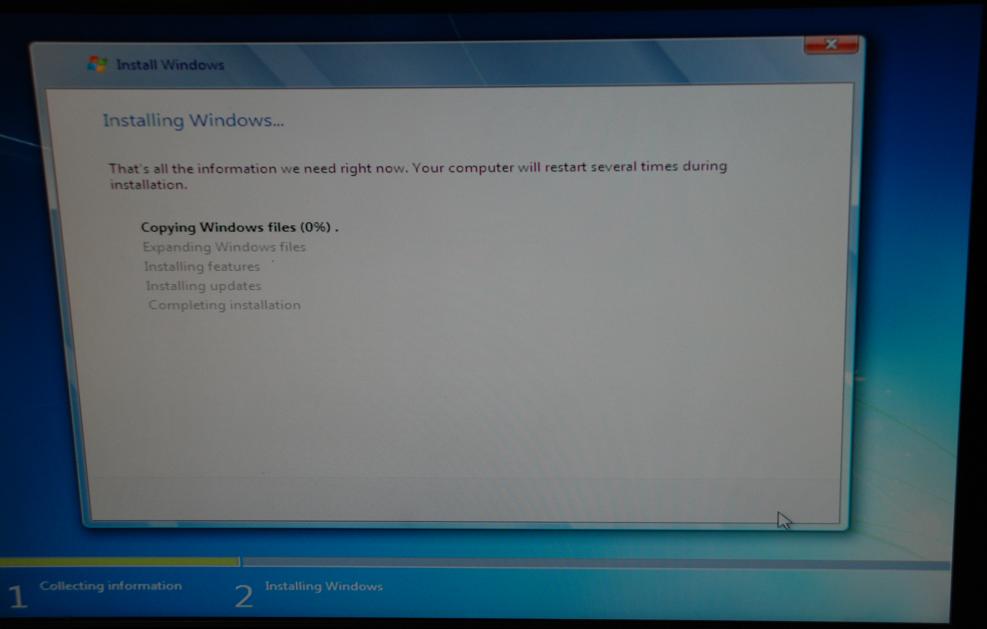
9. Windows 7 will detect the array, hit Next when it shows your RAID volume (it will only will only show up as one drive as it is a virtualized volume) allow it to go through the prompts and steps for installing the OS.
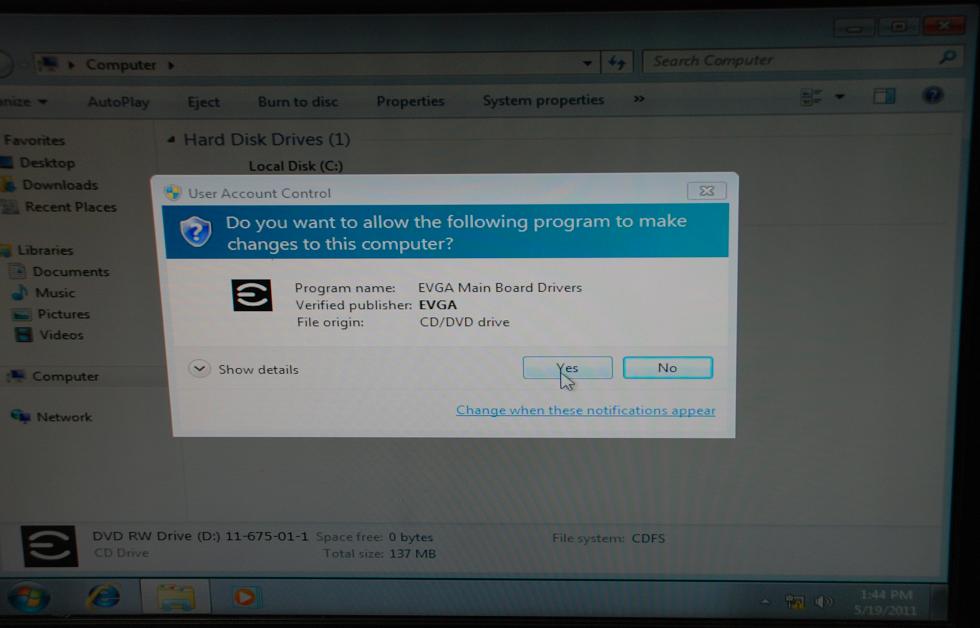
10. This chipset is similar enough to previous designs by Intel (X58 and P55) that Windows will detect most of the motherboard drivers, however since they are not the same I do recommend installing them from the disk. Insert the provided driver disk and select “Install Motherboard Drivers”.

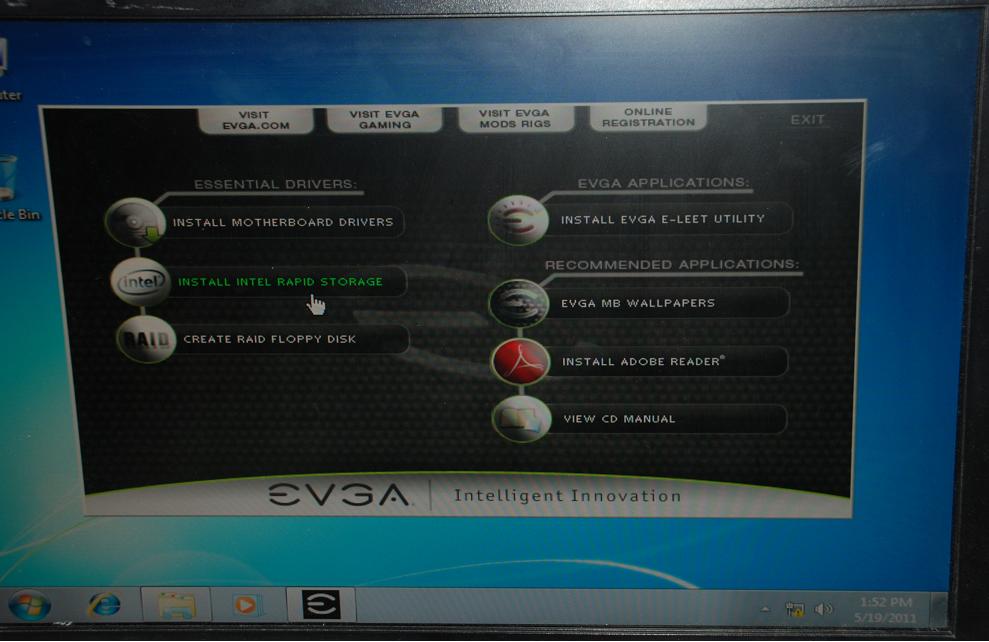
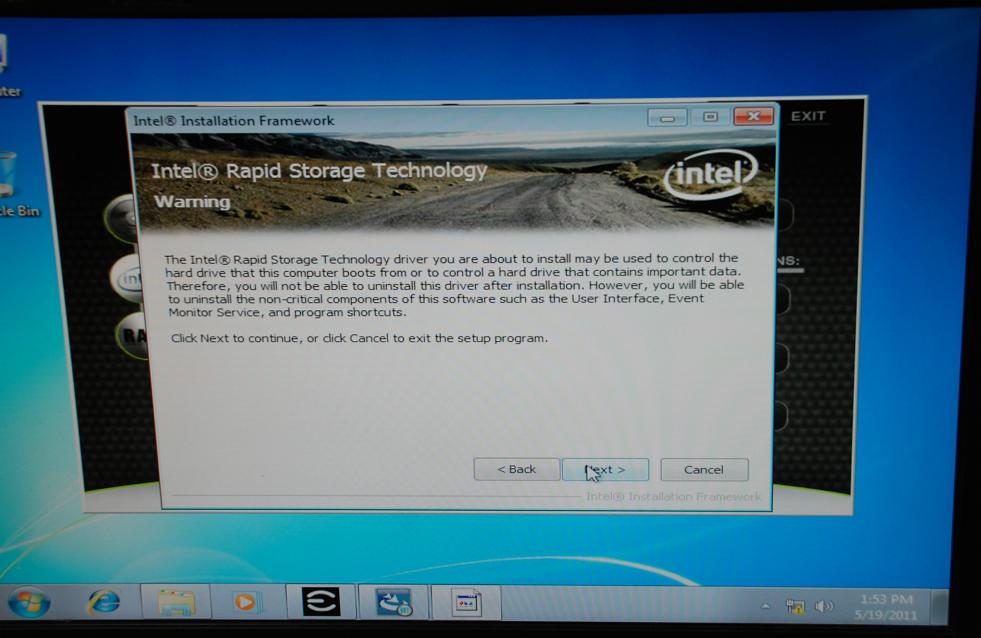
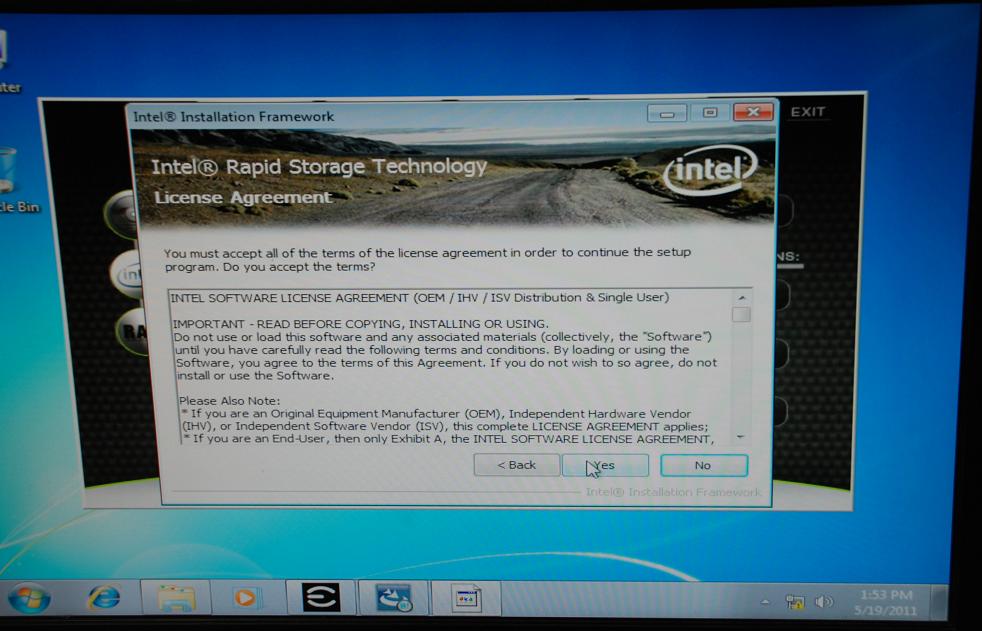
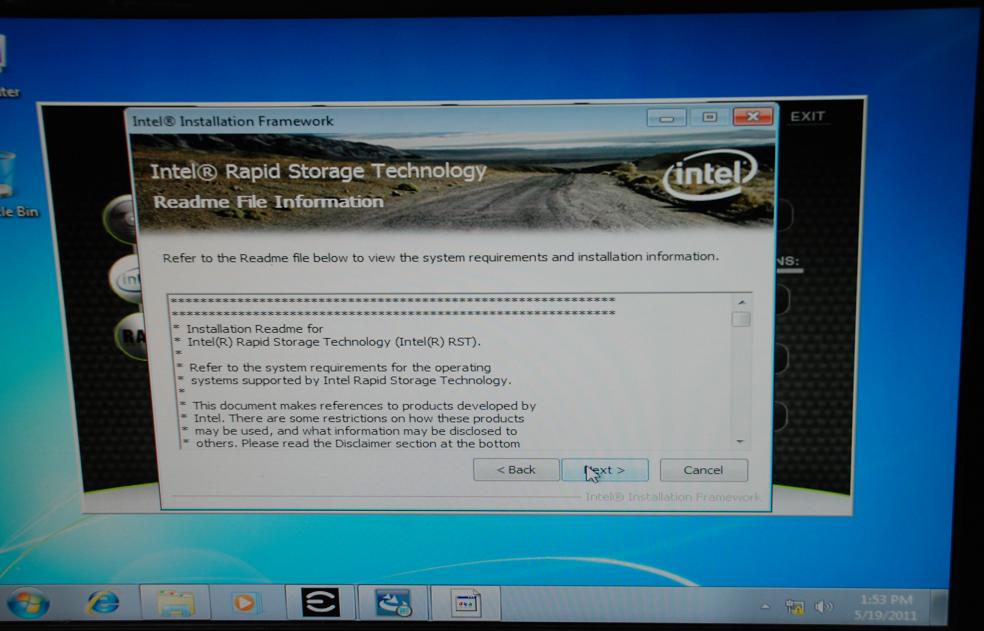
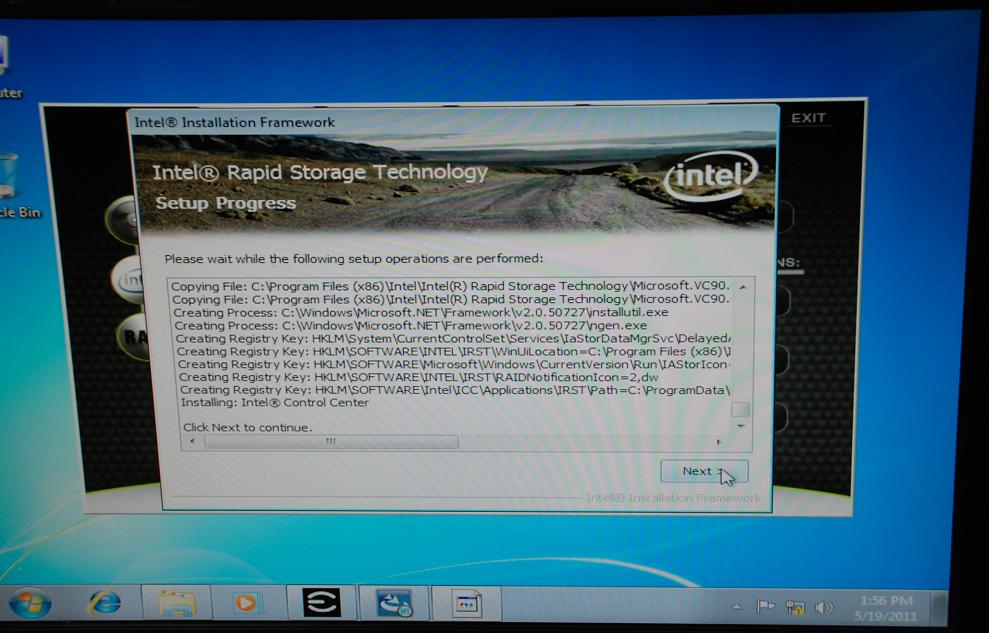
After the drivers are installed, please select “Install Intel Rapid Storage” It will ask a series of questions, please select Yes or Next on all, and allow it to reboot at the end of the install process.


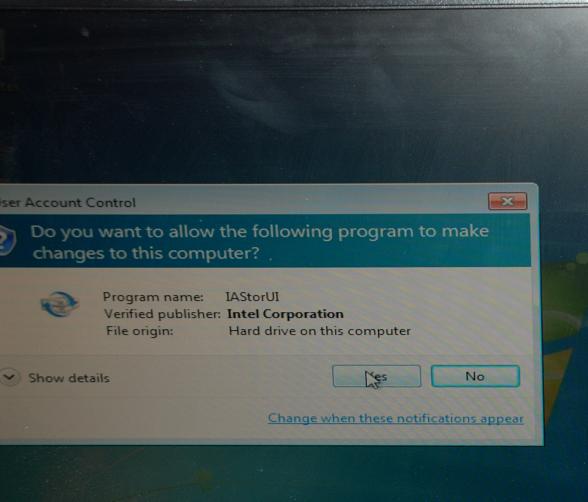
11. After reboot, open the monitoring software for your array. Start – All Programs – Intel – Intel Rapid Storage Technology, and select “Yes” when Windows asks you if it is OK to launch the software.

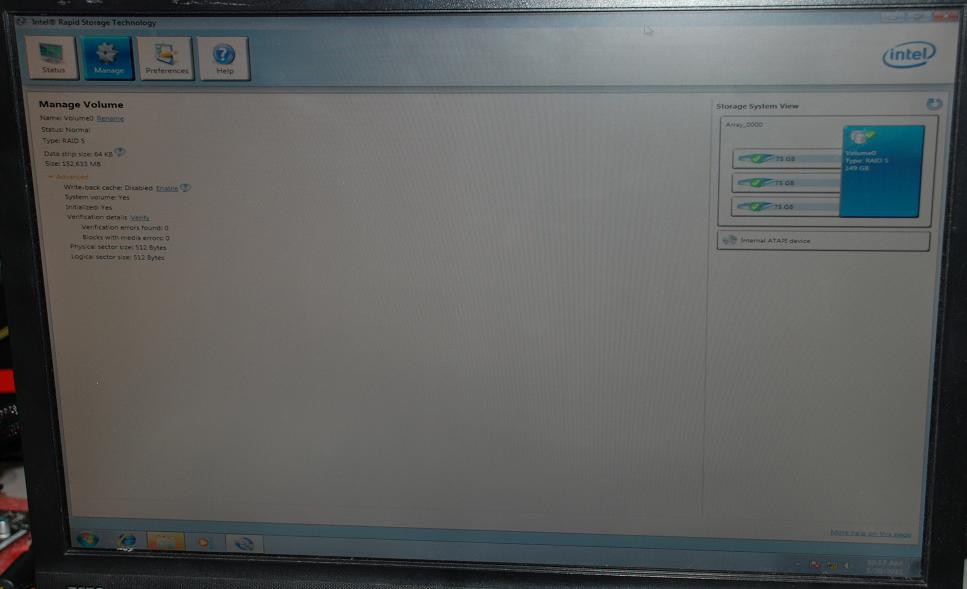
12. Once inside, select “Manage” on the top, once on the manage screen, you see the RAID status on the right.
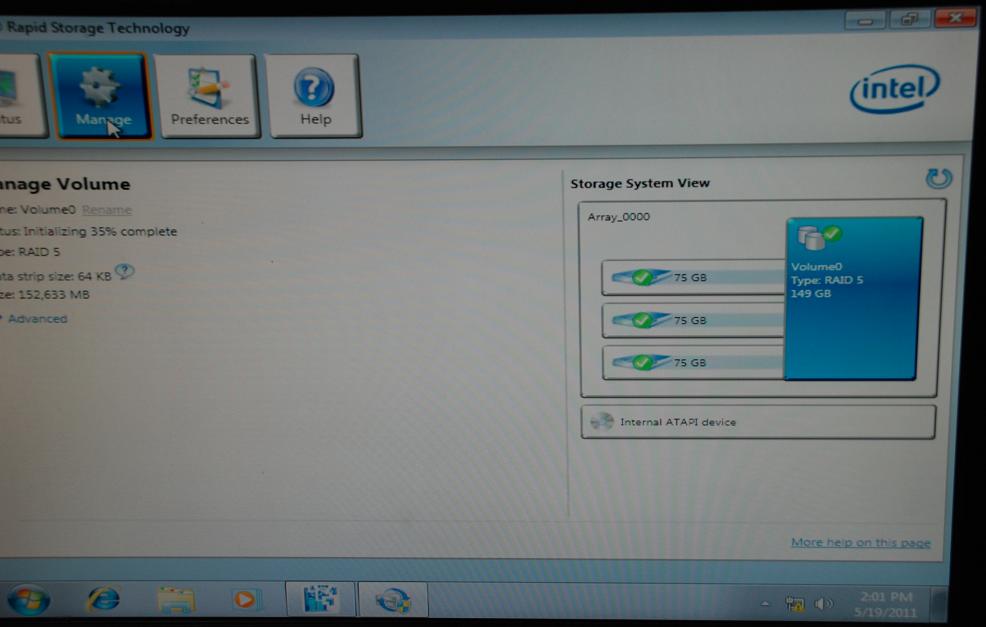
At this point the array is built and functional.
Rebuilding the array
There will be 2 smaller sections below, one for rebuilding within the controller, one for rebuilding from within the OS via the installed raid management utility.
Rebuilding within the controller.
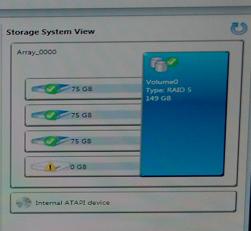
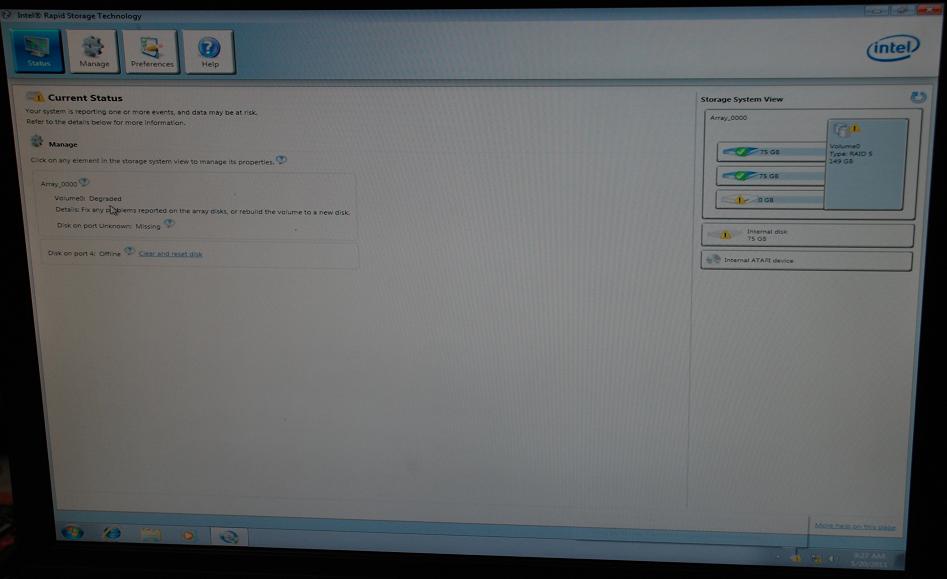
1) For testing purposes, I simply unplugged a drive. Now upon bootup, the RAID controller shows degraded.
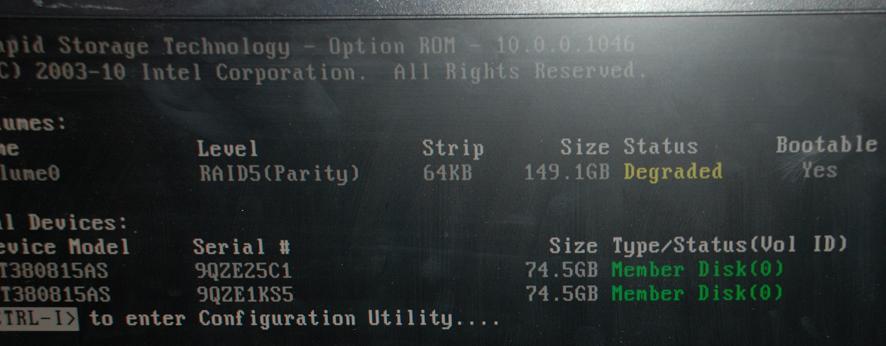
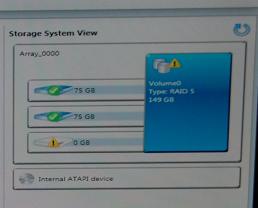
If you allow it to go into windows and check with the Intel raid manager you will see a similar alert.
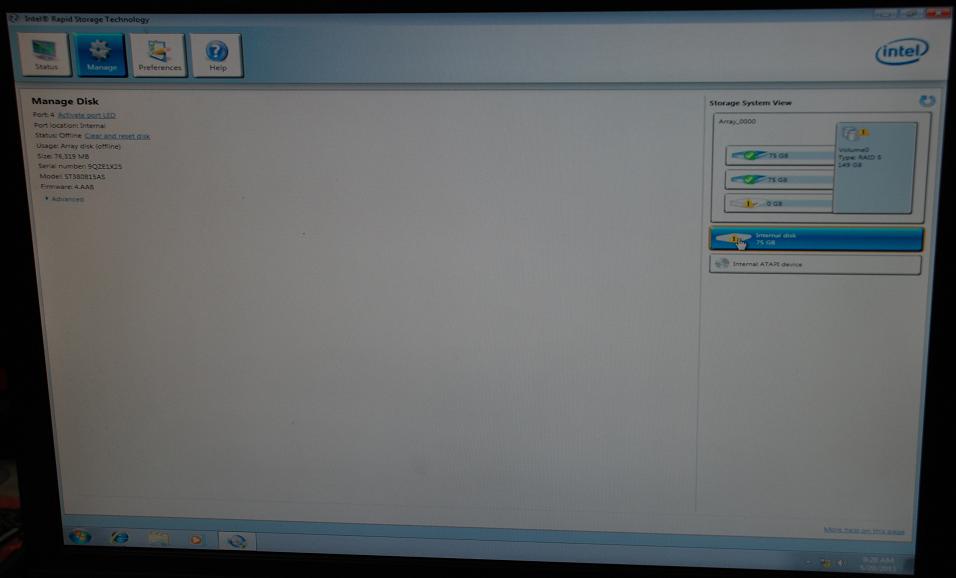
2. Power down the system. Install a new HDD in place of the failed HDD and power up.
3. Once powered on, Press CRTL-I to get into the RAID BIOS. Once in you will receive a popup stating it has found a replacement hard drive.
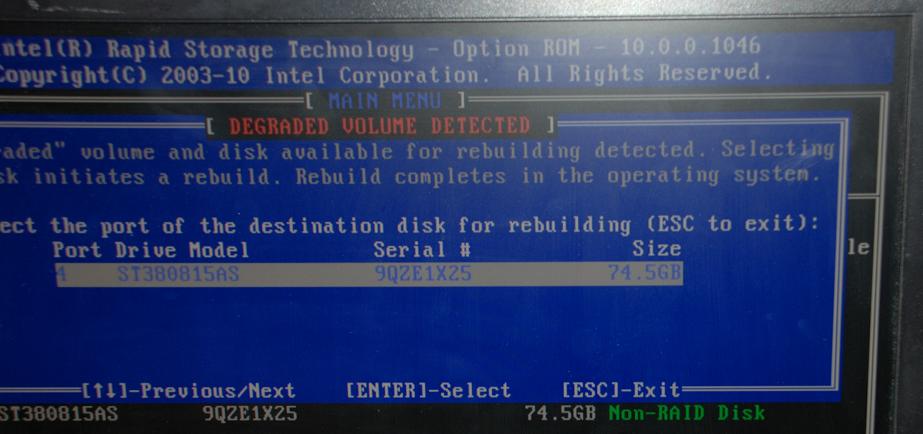
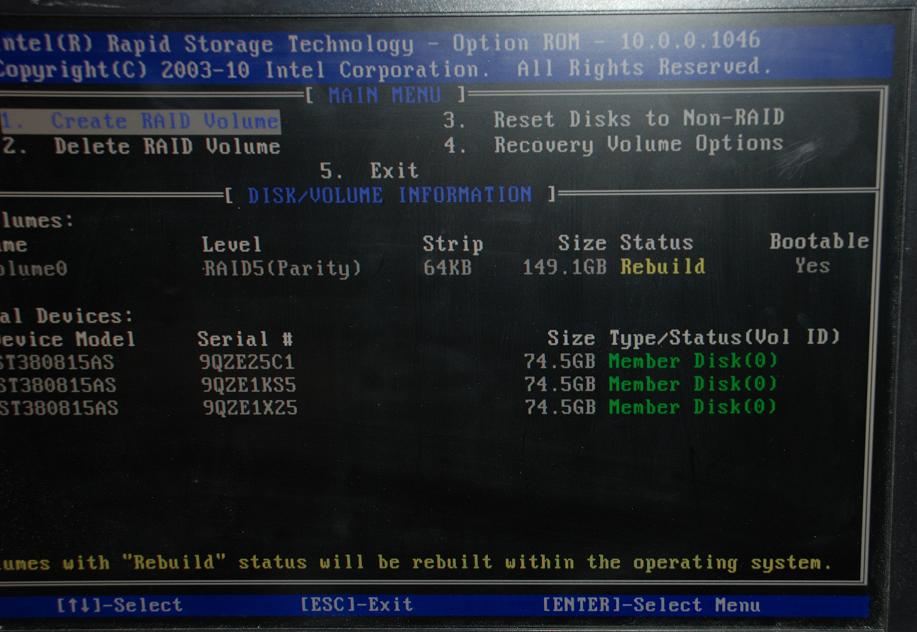
Simply press Enter on the selected drive. Which will bring you back to the base menu in the RAID controller, and the status will show as rebuilding. Select 5 with the arrow keys to exit.
4. Upon entering windows, go back into the Storage controller and select manage, you will see a window like this on the right side.
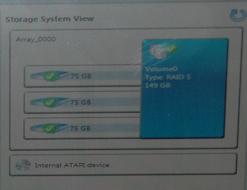
This is what we are expecting to see here. The array is degraded, but is in the process of rebuilding. Allow it to finish, and the status will be updated to looking like this.
Also, if you have used our previous board such as X58, P55, or older NForce designs, you will see a marked improvement on the rebuild speed of the array versus our older boards.
Rebuilding from within Windows (advised if this is not a clean/new HDD, or if you prefer a GUI)
1. I have unplugged a drive form the array to for a degraded status. Upon booting into windows and going into the RAID controller software I see a notice that the array is degraded.
2. Power down, remove the failed drive, and install a replacement and power back on. Once into windows, go into the raid controller again, and you will see the missing drive in the array, and a separate drive (that has data on it) in this case, it was a drive from a previous RAID array, so the controller does not automatically start the rebuild.
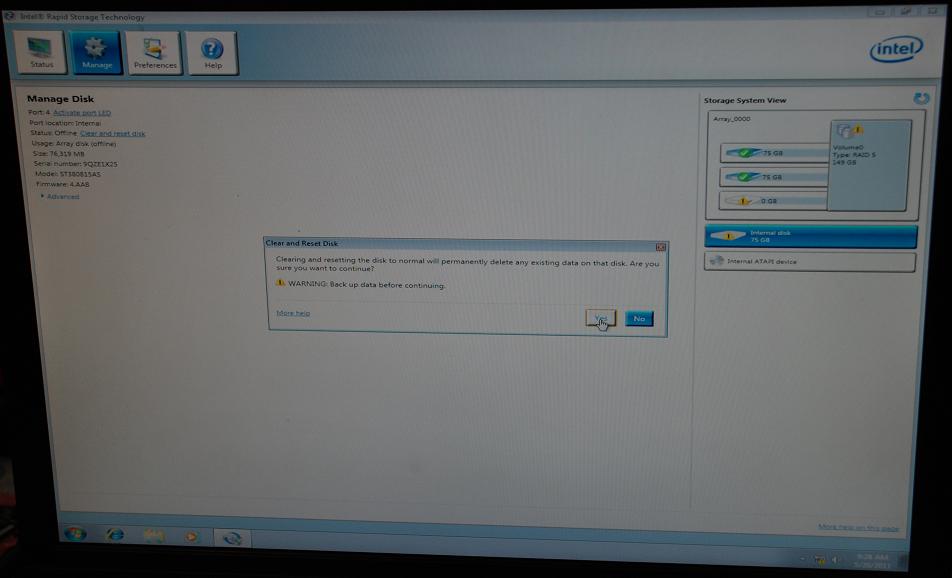
3. Right click and select Clear/Reset Disk on the drive that shows separate from the array, then click “YES” from the popup window.
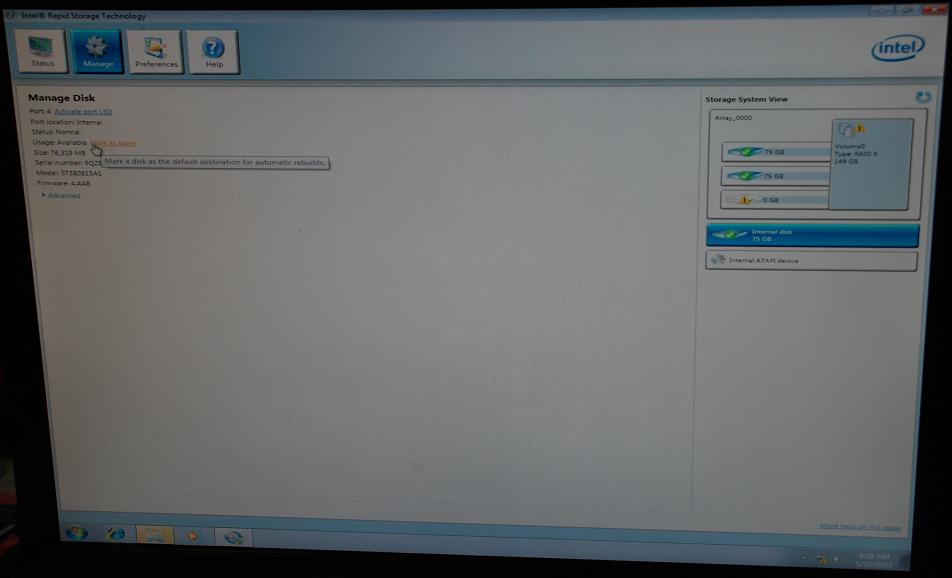
4. Now you will see the extra drive, as shown on the right has a green check indicating it is ready to be used. Select the drive by left clicking on it. Now on the left side, on the 4th row down it says “Usage Type: Mark as Spare” click on Mark as Spare.
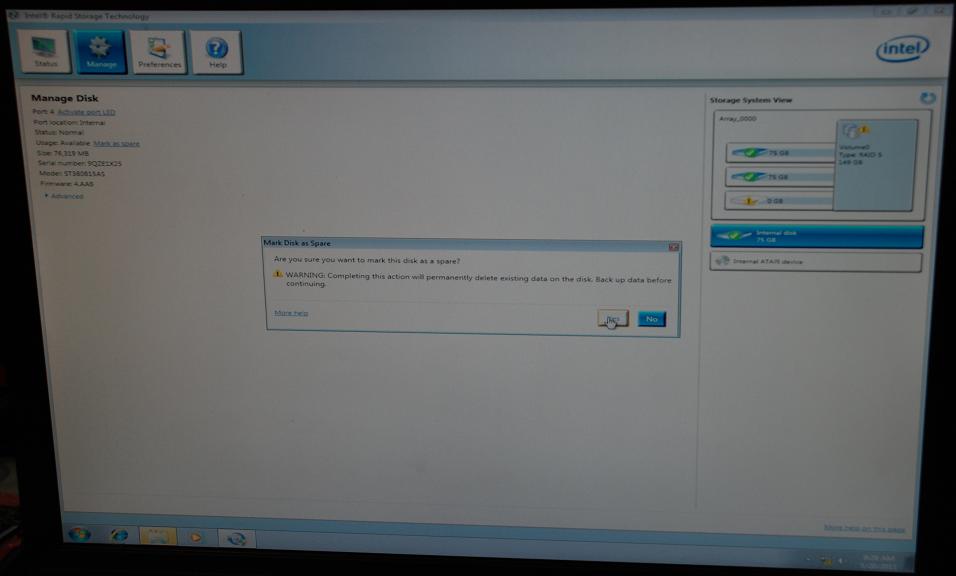
It will then prompt you to continue with the updating to spare, as it will format the drive, and as this drive is sitting on a degraded array, once the spare process has finished it will automatically start the rebuild.
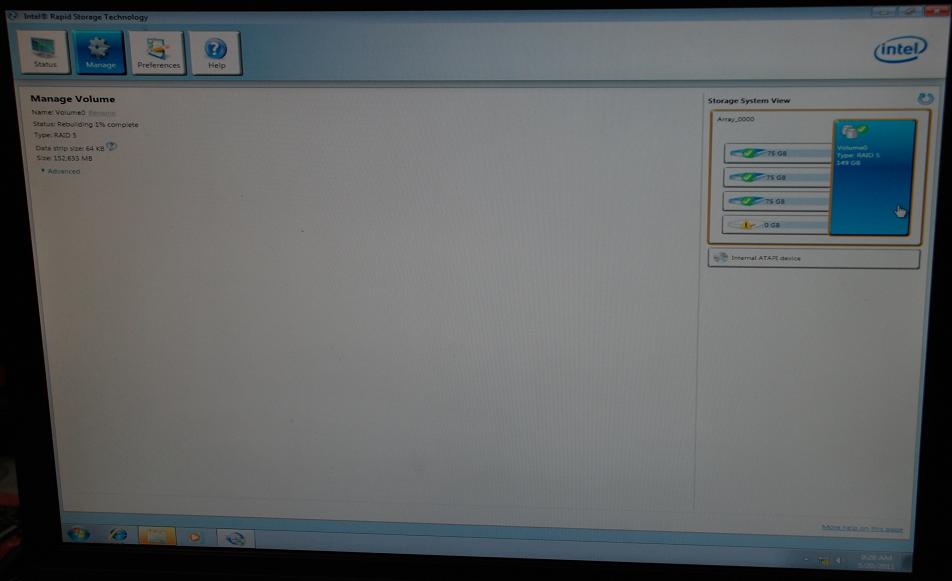
5. As you see in above picture, the array is rebuilding. Once it is done, the screen will update to look like this:
This indicates the array is rebuilt, and in proper running order, and its redundancy is restored.