BUILDING THE ARRAY on Intel ICH10R Controller
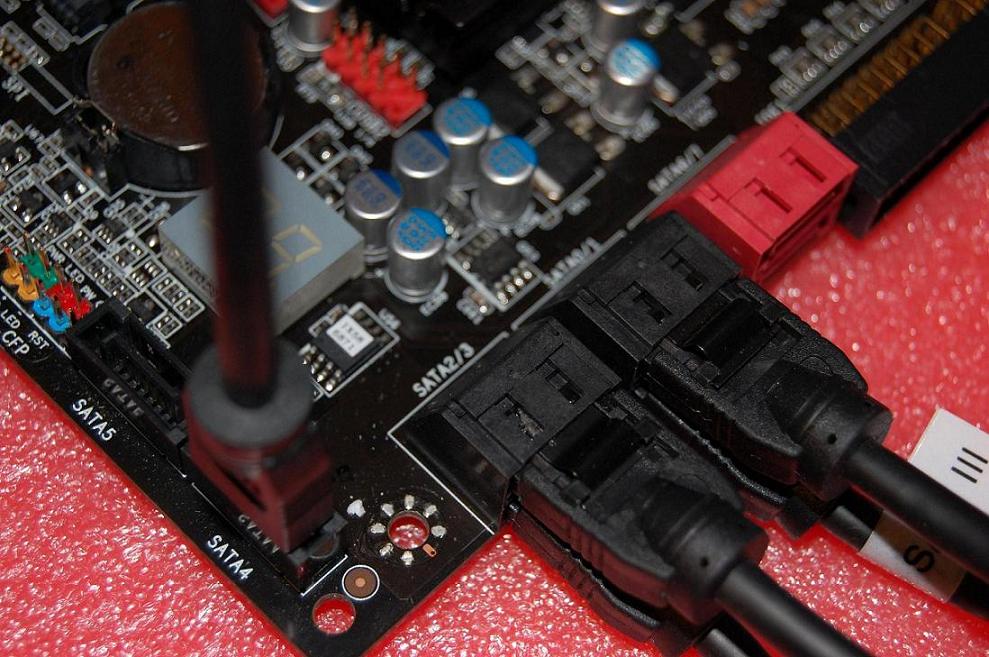
1) First, make sure all drives desired to be used in the raid array are plugged onto the BLACK sata ports.
2) Power on and enter BIOS via the delete key during the first screen
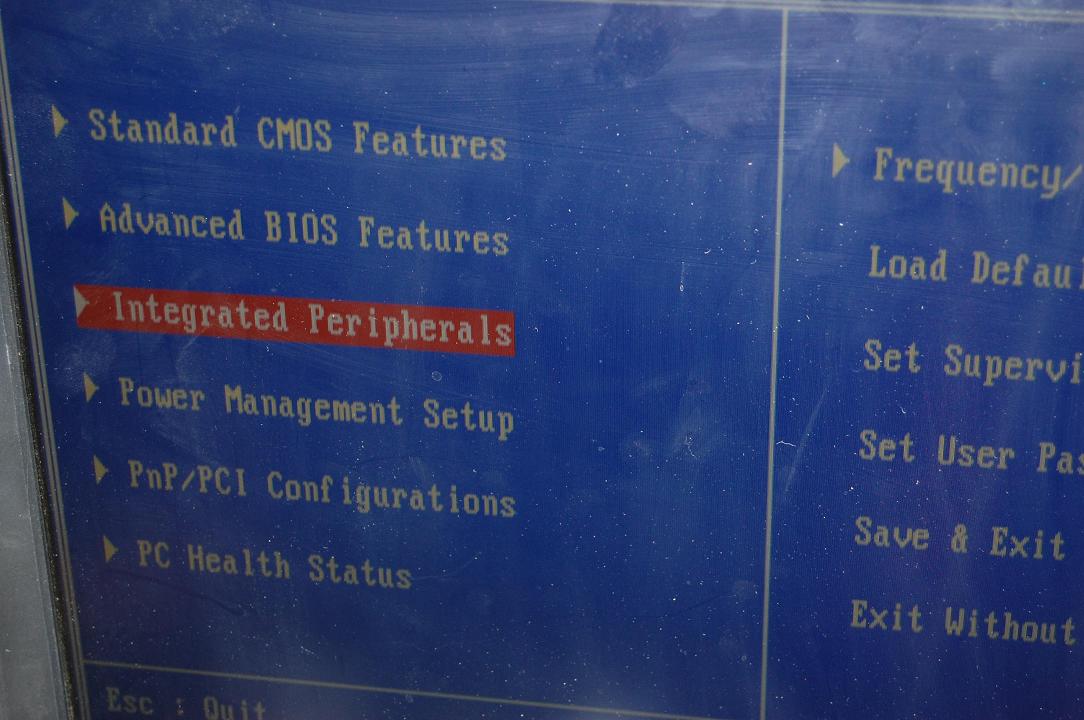
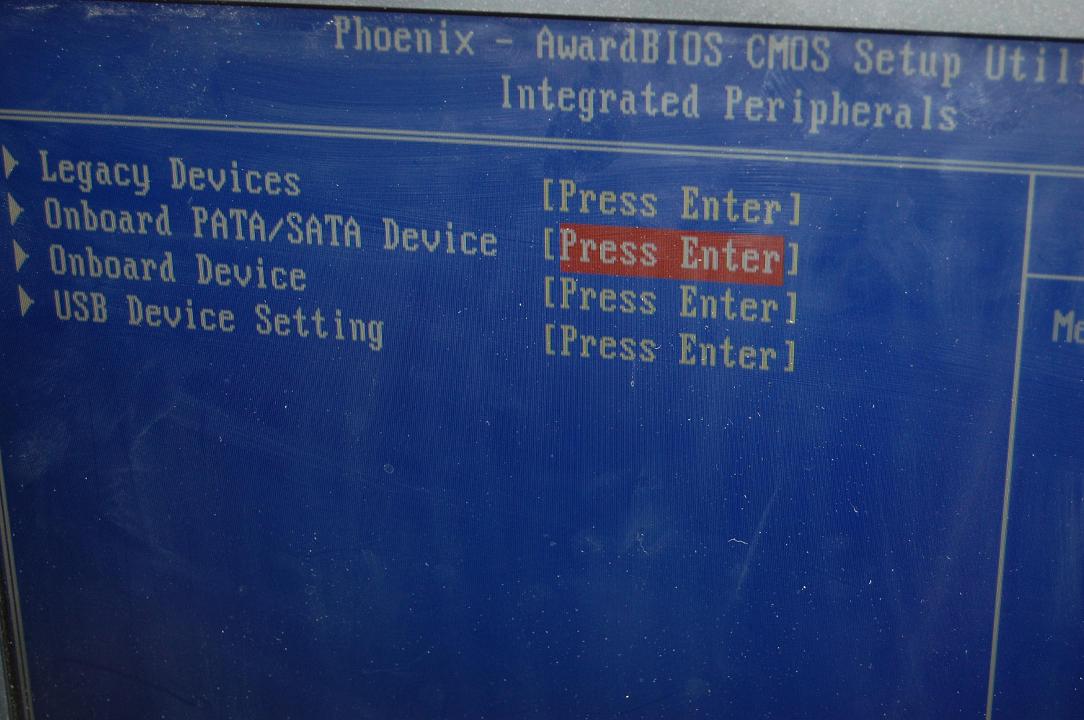
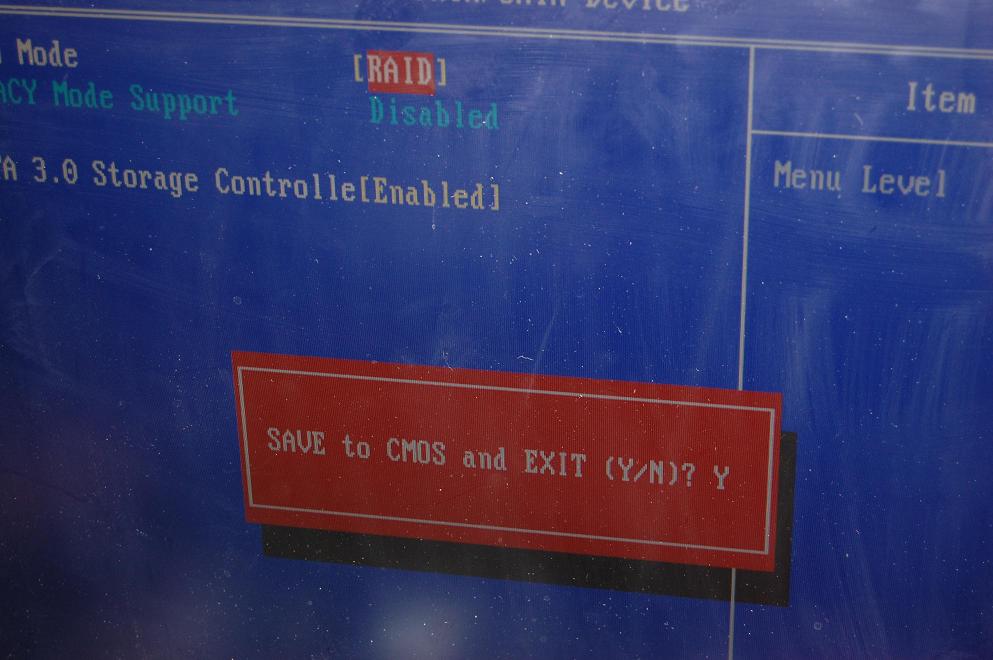
3) We will need to enable RAID on the ICH10R controller. Go to Integrated Peripherals – SATA/PATA Device (may have slight variations on naming depending on exact board and BIOS revision)
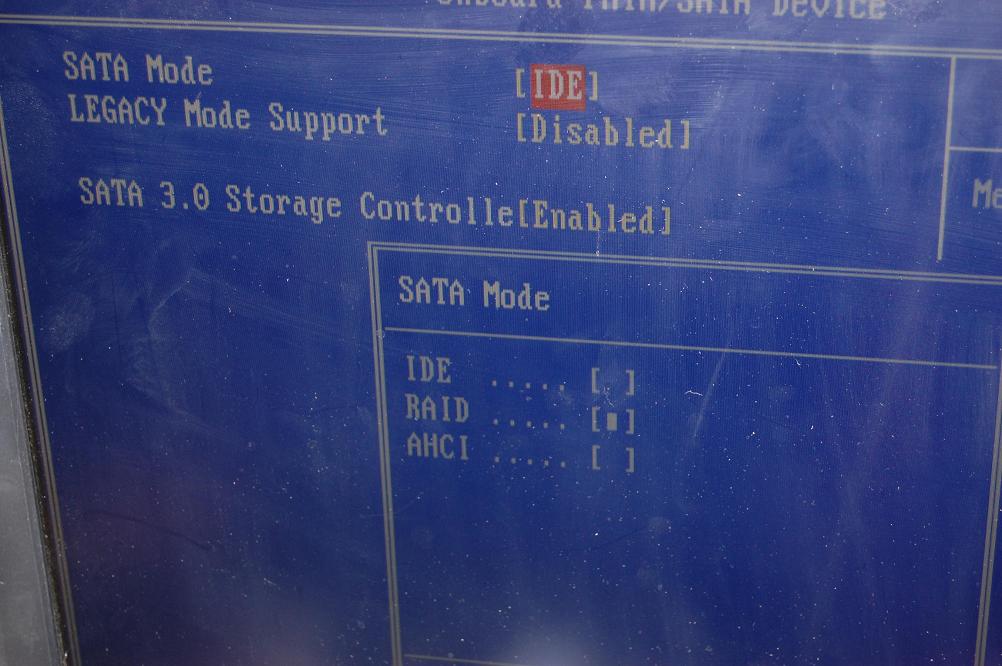
4) SATA Mode by default is IDE, press ENTER and select RAID from the menu.
5) Press F10 to save and Exit BIOS.
6) After POST screen press CTRL-I when prompted to enter the Intel RAID Manager.
7) In the utility, select “1. Create RAID Volume” with the arrow keys and press ENTER.
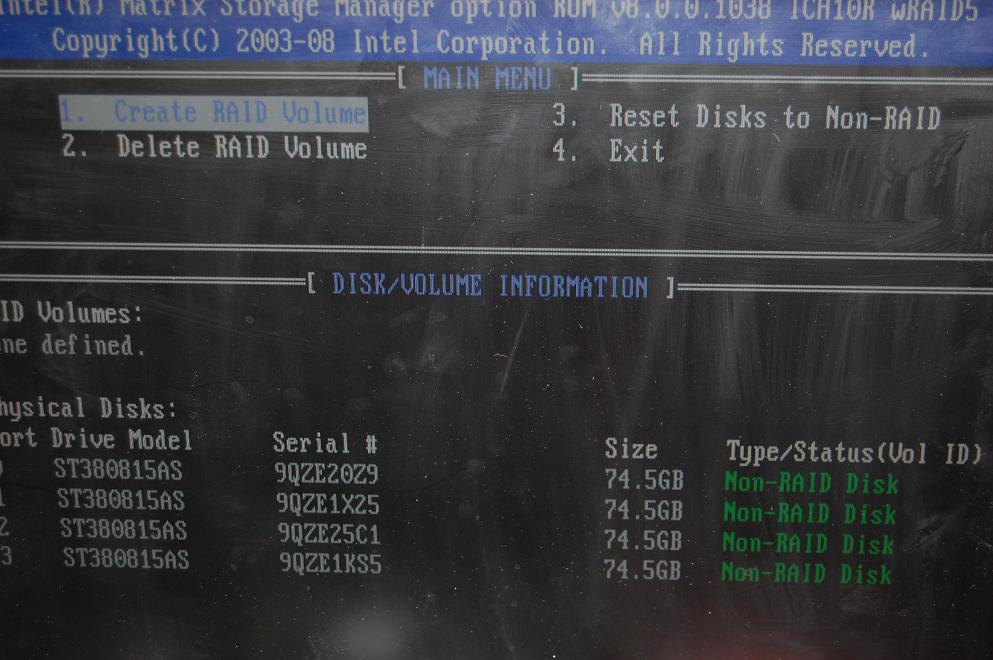
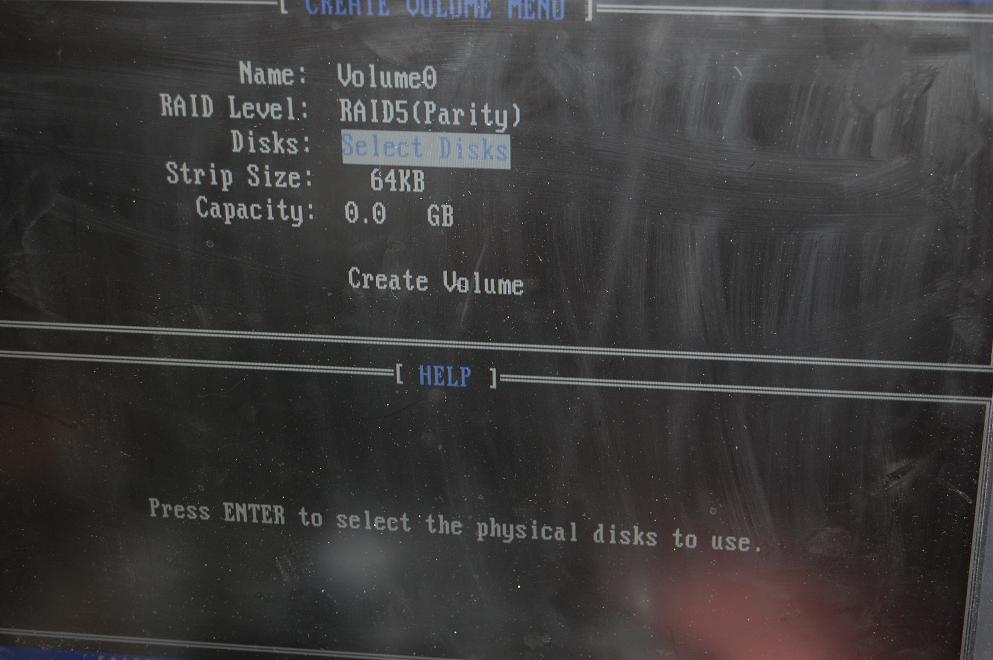
8) Name the raid or leave at default, press enter, on next line select RAID type. (For descriptions and how various raid levels function please see https://www.evga.com/support/faq/afmmain.aspx?faqid=58543)
9) Press ENTER to select disks, use the space bar to select and arrows to go between disks on the list.

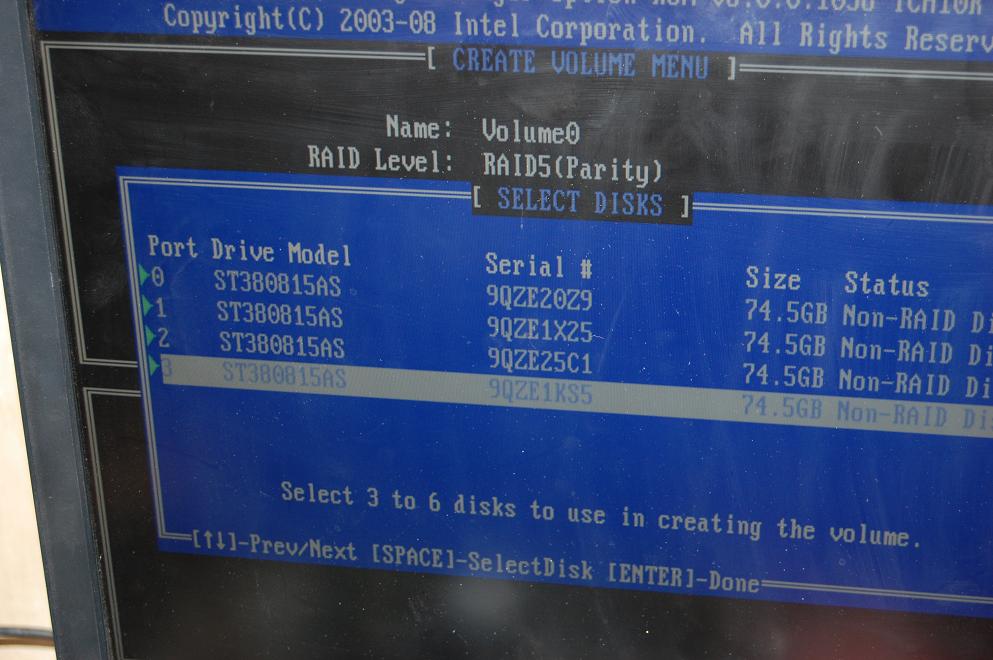
See green triangles above on the left side indicating which drives have been selected.
Press ENTER once selections have been made.
10) Select stripe size (advise you leave this as default) press ENTER.
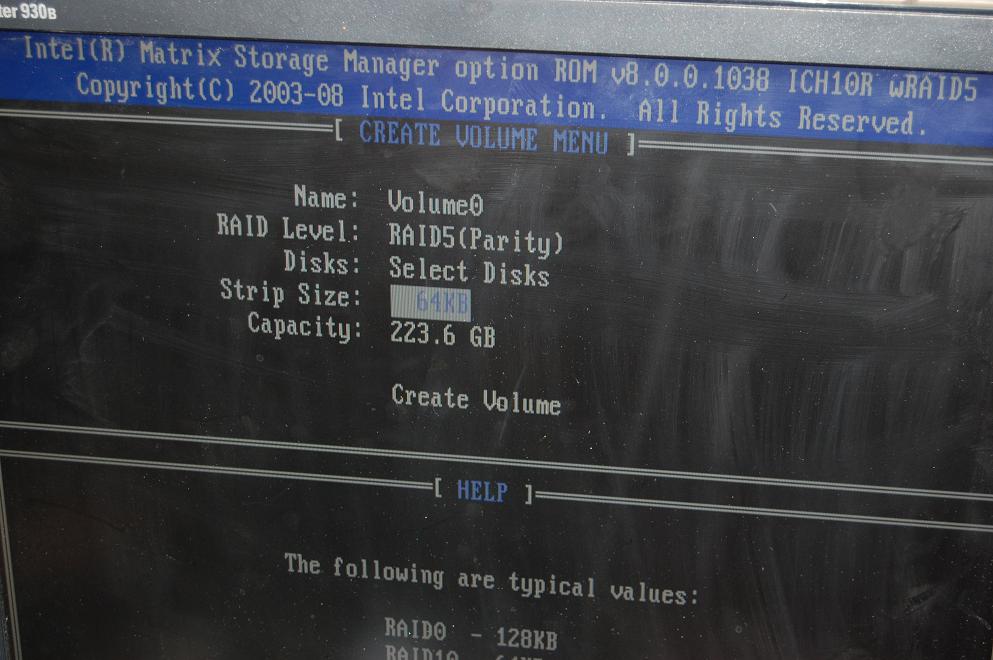
Capacity is 223.6gb. The array is RAID 5 and 4x80gb HDDs. To calculate capacity of RAID 5 take 1 less than the volume of drives and multiply by capacity. 3x80=240. Allow some capacity loss for format as well as some is used by the array in building and interconnecting the drives data.
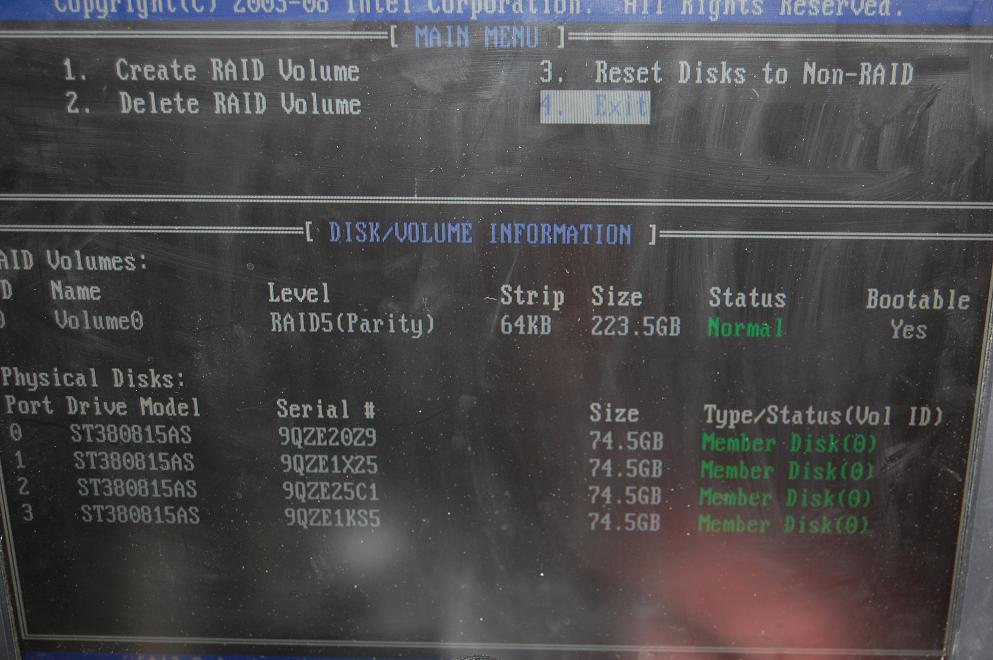
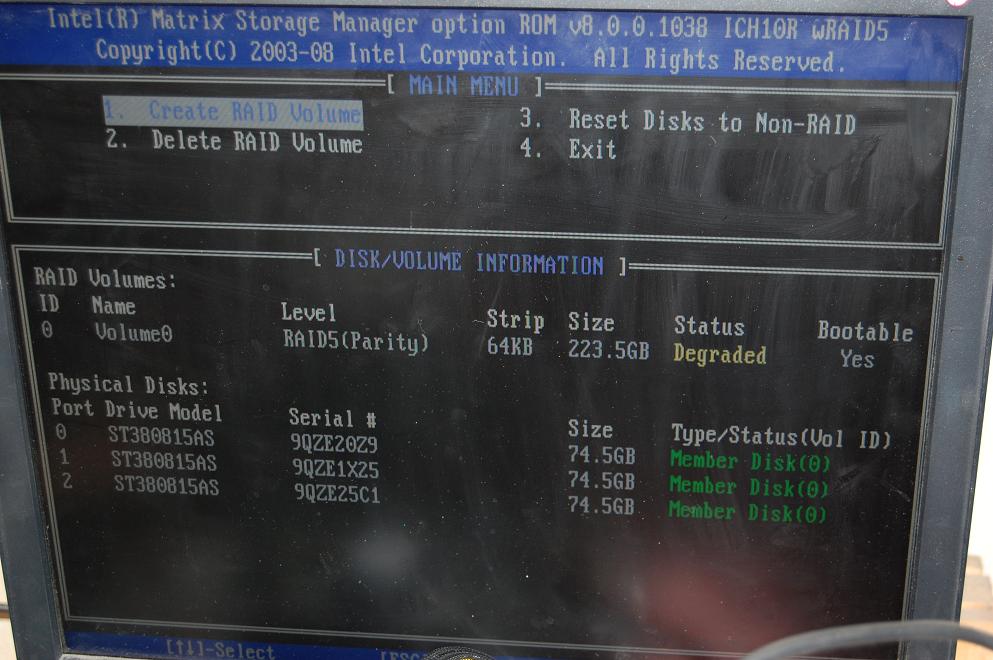
11) Status should read “normal” or “optimal” and all selected disks should show as Member Disk
Below pic is within the raid manager (CTRL-I menu)
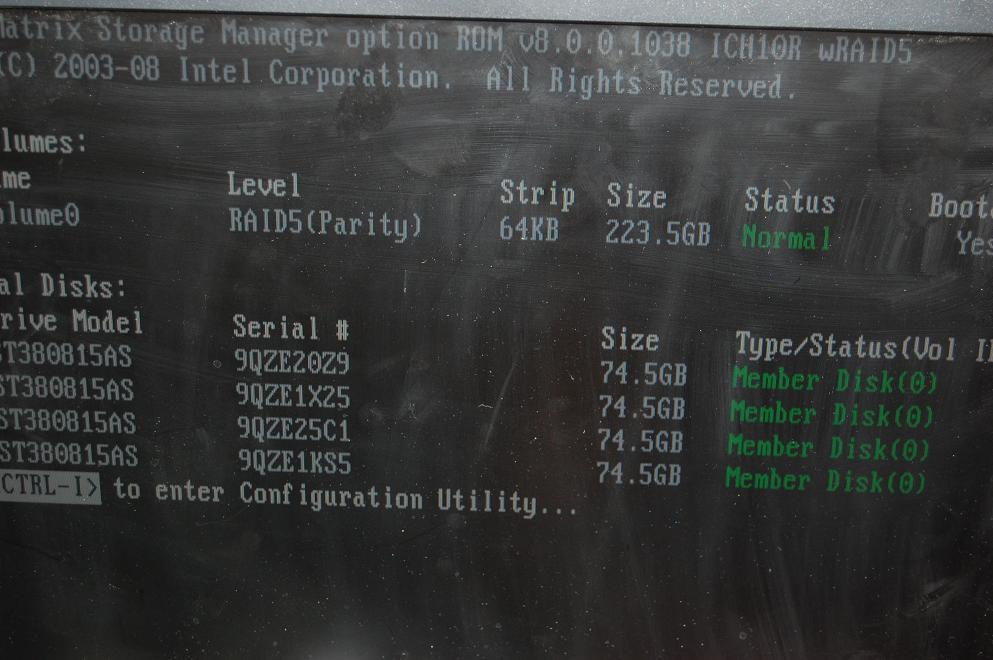
Boot screen raid info above
12) Procede with a standard Windows 7 install, and the drivers for the array controller are imbedded in the OS, no special installations are necessary.
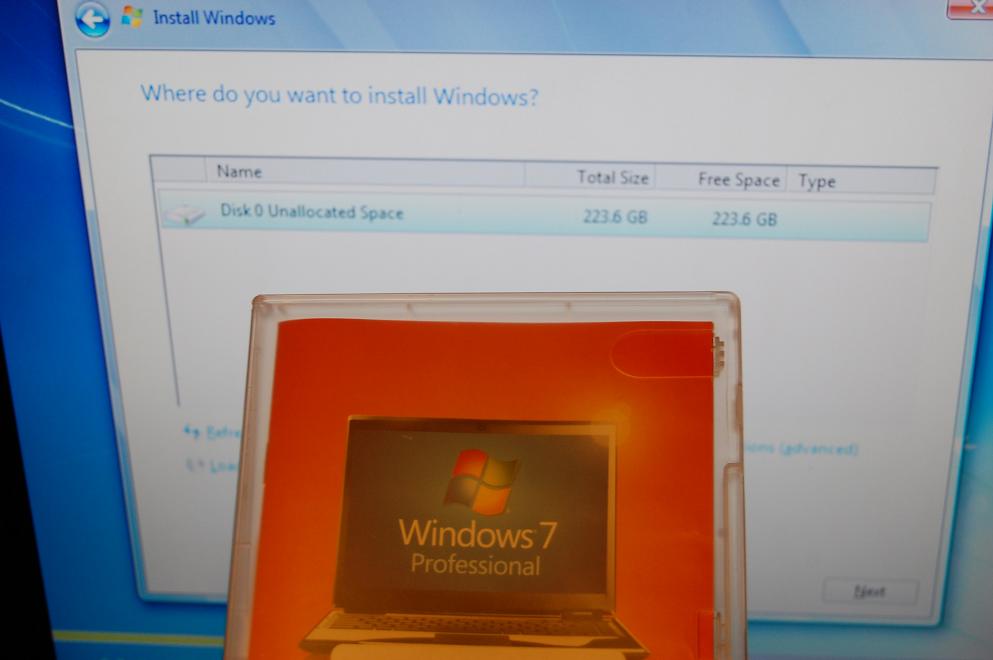
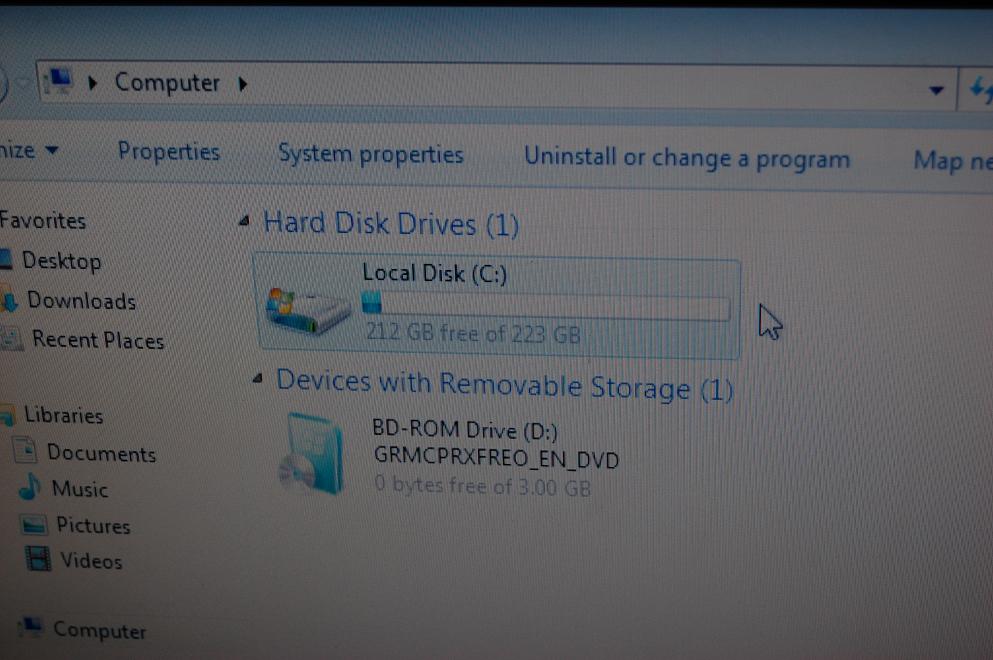
13) Once into Windows your array will show as one drive in Computer.
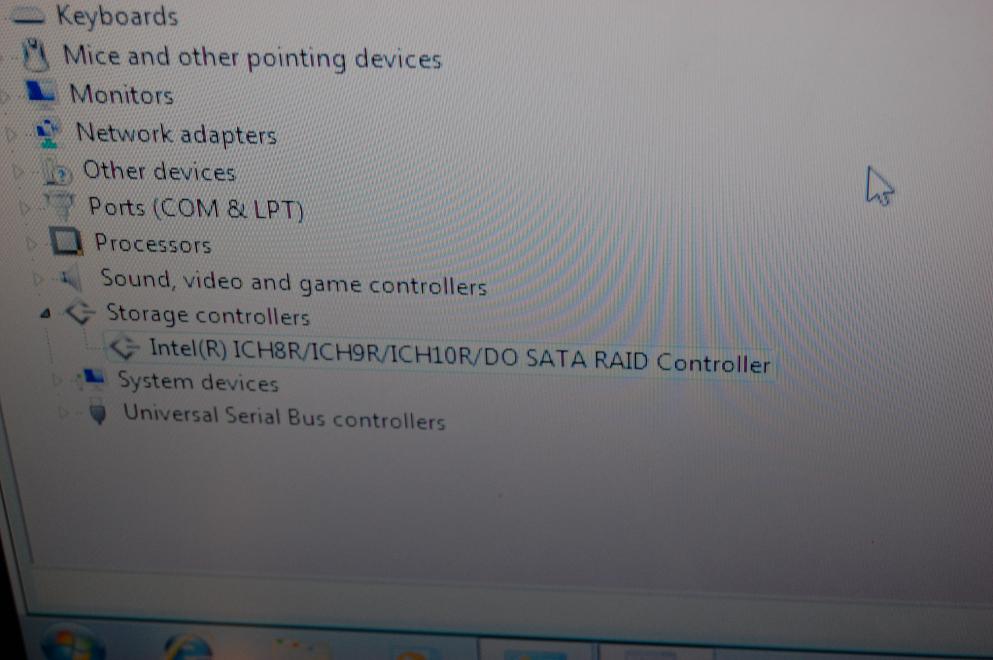
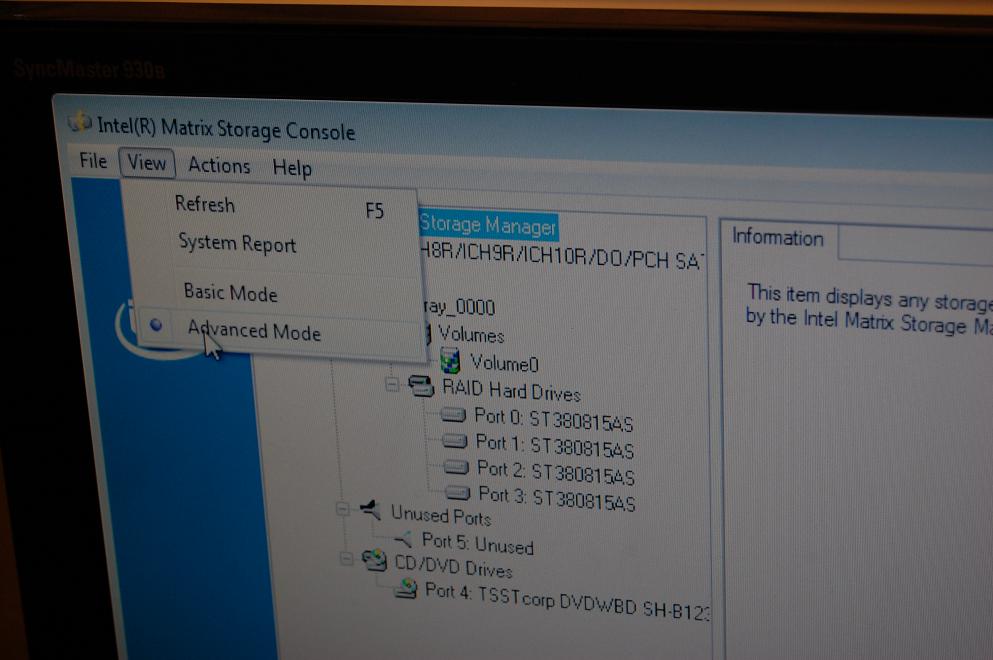
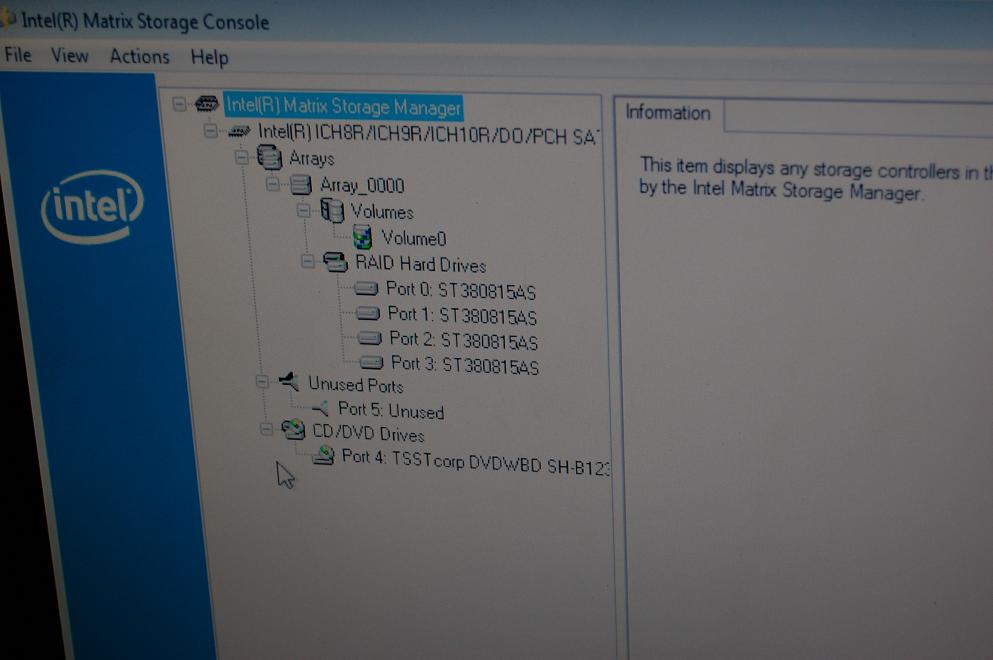
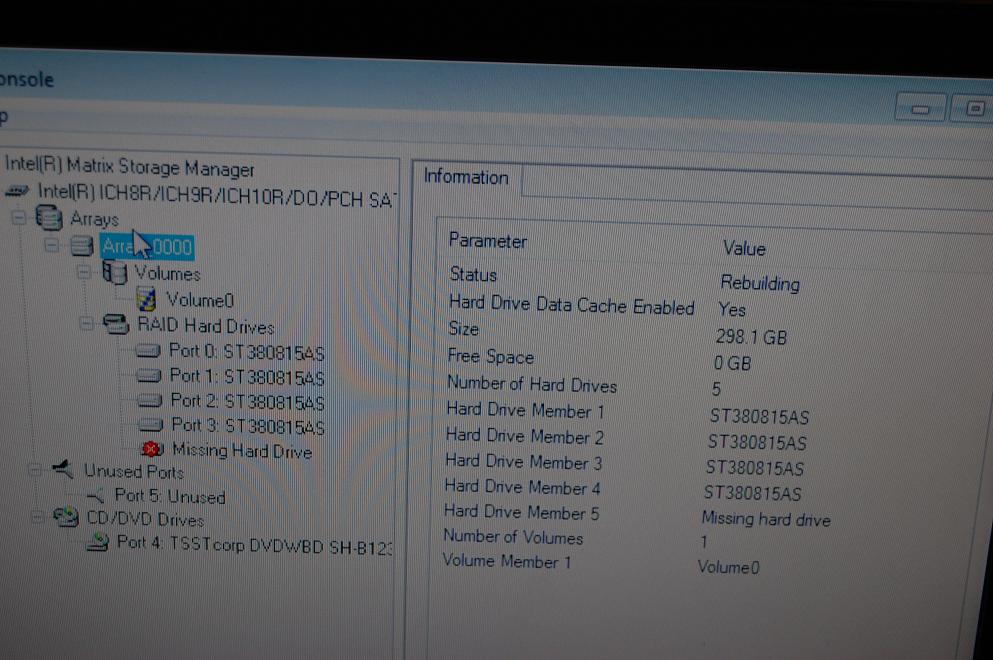
14) In your programs menu, you will find the Intel Matrix Storage Manager. Open it to view the status of the array, under options, select Advanced Mode, and you will see the pic below, and see the status of the drives.
Rebuilding an array due to missing or failed volume (disk)
1) When a drive fails in the array, you will need to remove and replace it. Now depending apon the array type (0,1,5,0+1) you will have different options. If a raid 0 loses one drive, the array has failed and data is lost, the only way to recover it is to send the drives to a data retrieval company. Now raid 1 (2 drive mirror) raid 5 (stripe with distributed parity) or 0+1 which is nested raid, or multiple raids arrays functioning as members of a raid array, is 2 stripes mirrored together.
As long as you are using an array with a form of redundancy, rebuilding should not be an issue. Now in the event of a drive failure, you will need to identify the failed unit. Remove it, then replace it with a new drive of like type, you can reuse the failed drive, but unless you can verify a port problem, it is generally not advised as it will likely fail again. Now your array will show as *degraded* which means it is functioning at a base level with **NO** redundancy, so if another drive fails you will lose data, however the array can function perfectly well in this state.
(degraded array in the IMSM)
2) Power down your PC. Attach the replacement drive to the same port and cables. Power on, and at the first screen after POST press CTRL-I to enter the IMSM. You will receive a popup from the raid controller regarding the degredation of the array and the detection of the new disk.
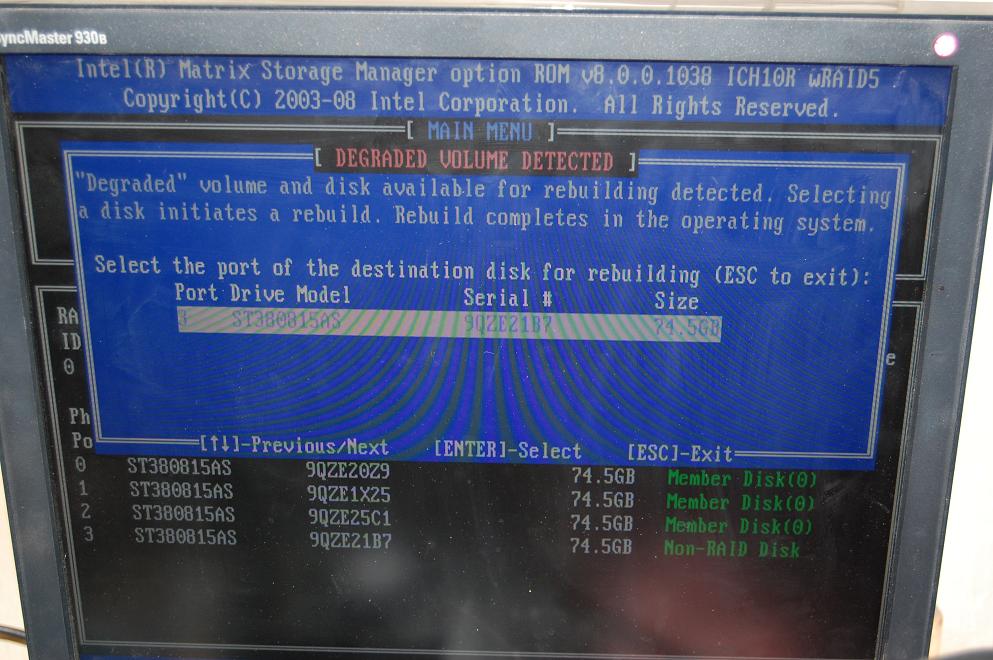
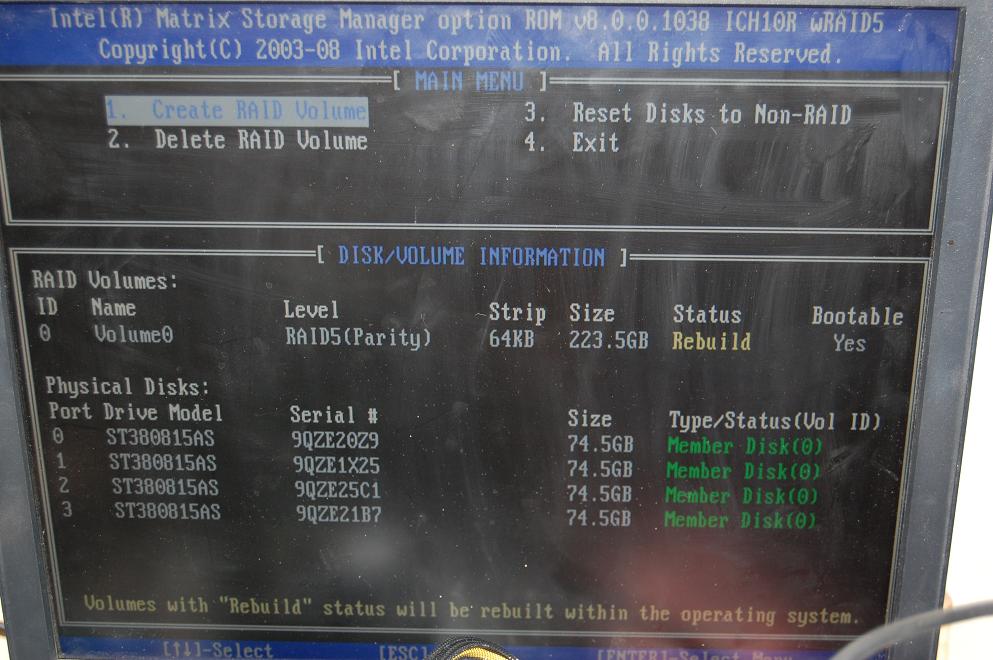
3) Per the message on screen, press enter. You will now see the nEw drive as part of the array, and the status set to “Rebuild”. And per the footnote at the bottom of the screen, you will need to enter windows (or other OS(s) and the array will rebuild in the background).
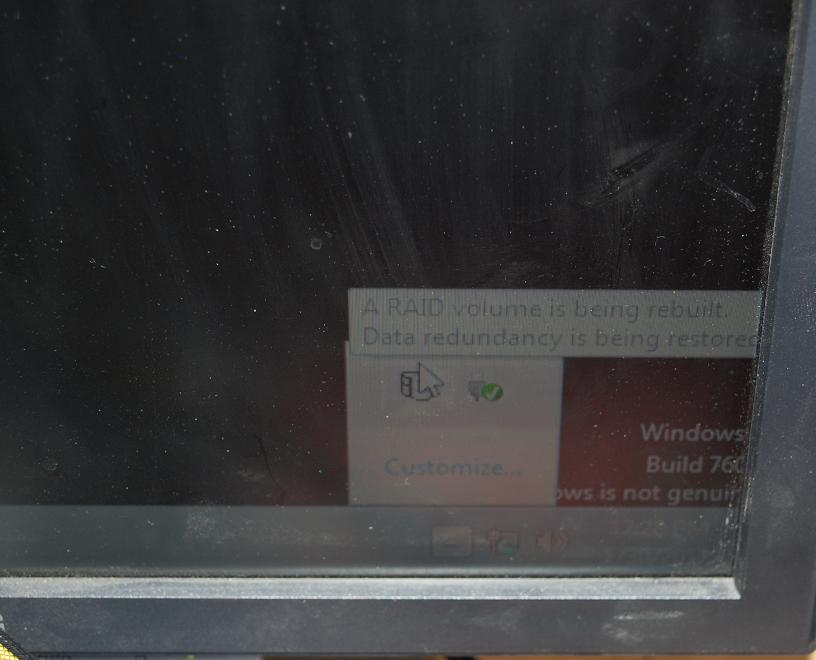
4) The rebuild process will take a while, anywhere from a couple hours as this is a RAID 5 array (RAID1/mirrors are faster at rebuilds) up to over 1 day, depending on the size and number of the drives, their speed, and the amount of data stored on them. Once into windows, there will be a small system tray popup letting you know the rebuild is in progress.
5) Below is the view from the Storage manager utility (available on your X58 driver CD or from our driver download page). Since there is a new drive introduced, you will actually see a extra drive, 5th in this case, listed. Once the rebuild process is finished, the “Missing Hard Drive” listing will be removed and the status will say “No active migrations”
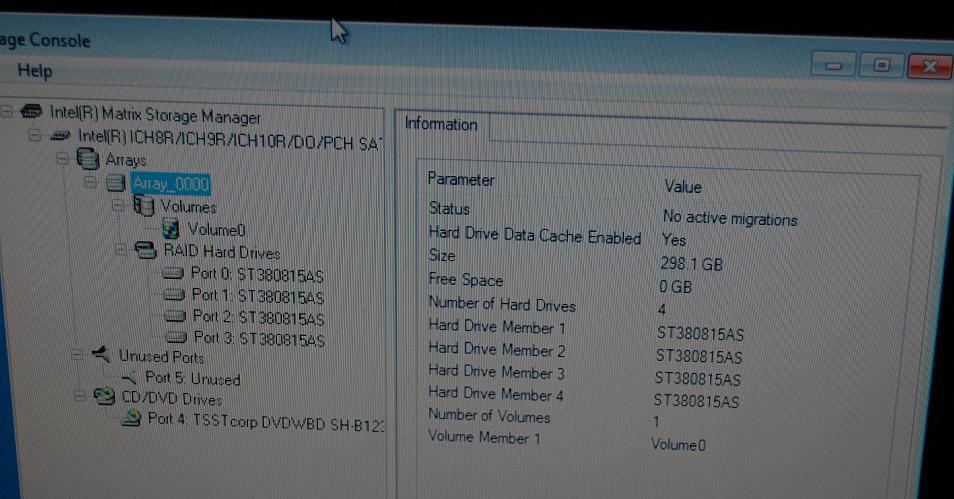
Above is a pic after the rebuild.
***SYSTEM WILL RUN SLOW DURING A RAID REBUILD, RAID5 MORE THAN THE OTHERS***
Now if you opt to do this through windows rather than the controller during bootup, it can be handled form within the windows based Intel storage manager.
1) As in above method, you will need to identify and replace the failed drive.
2) After replacement is installed, boot into windows. Enter the Intel Raid Manager. There will be a non-raid hard drive listed, right click on it and select “Rebuild to this Hard Drive”
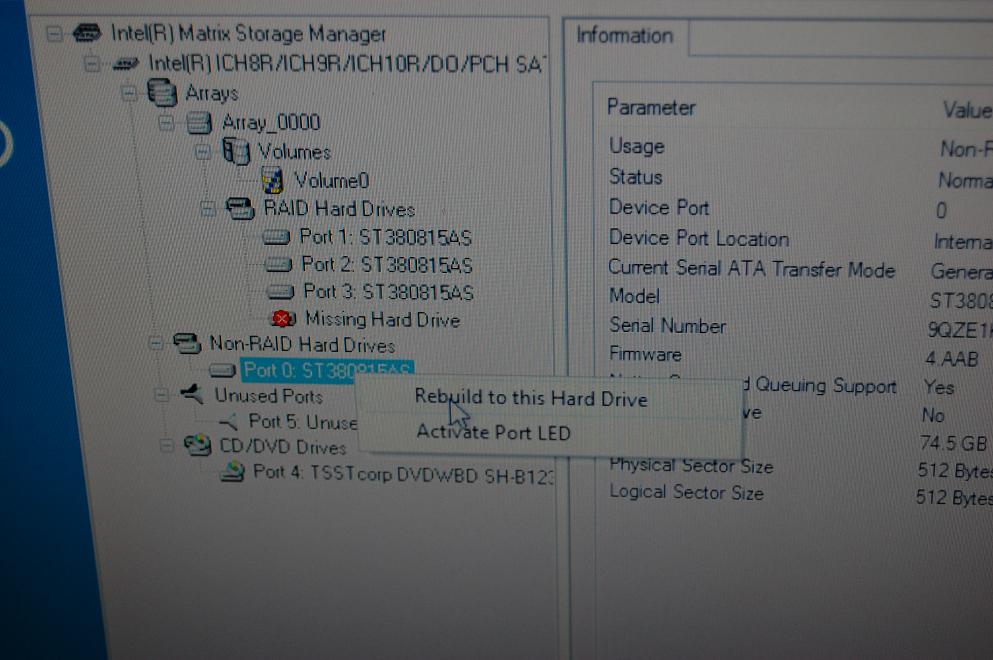
If this is a used hard drive (not generally advised) I would suggest using a drive zeroing utility on it from the manufacturer, if you decide against that, when you right click on the drive you will get the first option to remove current configurations, once that is selected you right click on it again and the message form the above pic appears. Select rebuild and the array will begin the rebuild process.